All posts by Russell Bates

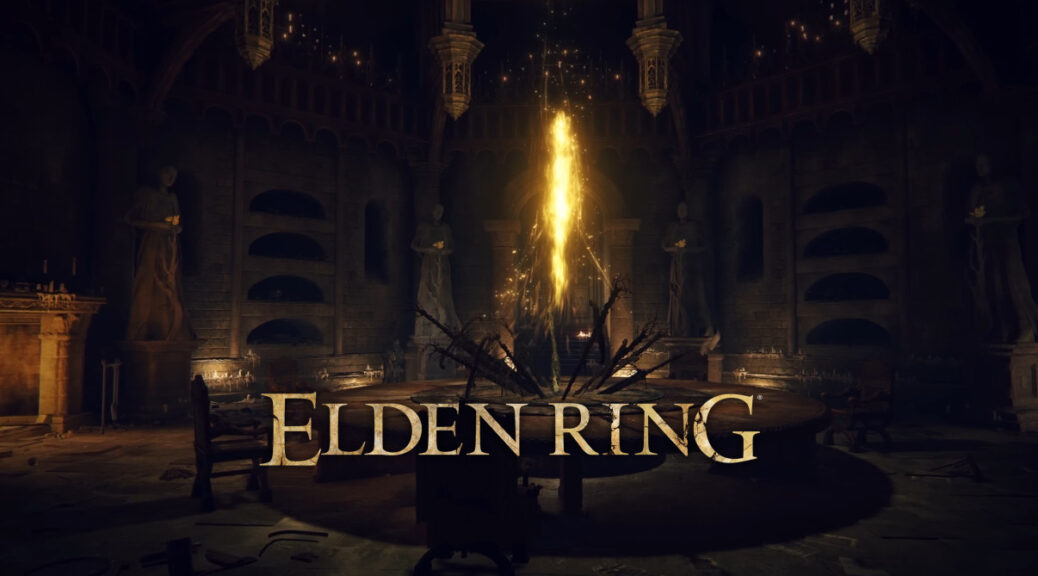
Elden Ring Rune Farming Secrets: Conquering Mohgwyn Palace

Is it necessary to grind in Elden Ring? To go out of your way to semi-mindlessly strike down the same wretches again and again? Not really. But that’s not going to stop us!

Elden Ring, the highly acclaimed open-world action RPG developed by FromSoftware, is a game known for its challenging combat, intricate world-building, and deep exploration. In this vast and mysterious land of The Lands Between, players are encouraged to venture forth, confront daunting foes, and uncover the secrets hidden within its sprawling landscapes. However, as players progress through the game, particularly toward the endgame content, the need for resources, experience, and power becomes increasingly apparent.

In the pursuit of mastery and dominance over the trials that await, many players find themselves drawn to the practice of Elden Ring runes farming — a methodical approach to acquiring the currency of power in Elden Ring. While the game does not explicitly necessitate grinding, the allure of maximizing one’s potential and overcoming formidable challenges often leads adventurers to seek out efficient methods of rune acquisition.

One such method has gained prominence within the Elden Ring community — a secluded locale known as Mohgwyn Palace. Tucked away in the depths of the game world, Mohgwyn Palace emerges as a prime destination for those seeking to bolster their strength and fortify their resolve for the trials ahead.

The Enigmatic Mohgwyn Palace

Mohgwyn Palace stands as a testament to the darker, more foreboding aspects of Elden Ring’s world. Bathed in blood and shrouded in despair, this accursed stronghold exudes an aura of malevolence that repels all but the most determined souls. Yet, within its shadowy corridors lie untold riches and opportunities for those brave enough to tread its halls.

Reaching Mohgwyn Palace is no simple feat, requiring players to navigate a series of convoluted pathways and overcome formidable adversaries. However, the rewards awaiting those who dare to venture forth make the journey well worth the effort.

Unraveling the Path to Power

The path to Mohgwyn Palace is fraught with peril, but for those willing to undertake the challenge, the rewards are bountiful. One method of reaching this sinister stronghold involves an intricate questline facilitated by the enigmatic NPC known as White Mask Varré.

By following a series of cryptic instructions and completing a set of tasks, players can obtain the Pureblood Knight’s Medal — a coveted artifact that serves as a gateway to Mohgwyn Palace. From infiltrating enemy ranks to unlocking hidden secrets, the journey to obtain this medal is rife with intrigue and danger.

Alternatively, for those who prefer a more expedient route, the discovery of a teleporter nestled in the remote reaches of The Lands Between provides a swift passage to Mohgwyn Palace. Though initially concealed amidst the desolate landscape, this teleporter offers a direct route to the heart of the palace, bypassing the need for elaborate quests or treacherous detours.

The Art of Rune Farming

Once within the confines of Mohgwyn Palace, players are presented with a myriad of opportunities for rune farming — the practice of systematically eliminating foes to amass wealth and experience. The palace is home to a diverse array of adversaries, ranging from lowly minions to fearsome champions, each offering their own unique rewards upon defeat.

The key to efficient rune farming lies in the strategic utilization of area-of-effect skills and long-range spells to dispatch multiple foes simultaneously. By unleashing devastating attacks upon clusters of enemies, players can maximize their rune yield and minimize the time spent engaged in combat.

Maximizing Efficiency

For those seeking to optimize their rune farming endeavors, the acquisition of powerful weapons and abilities is paramount. One such weapon, the Sacred Relic Sword, boasts a devastating area-of-effect attack known as Wave of Gold, capable of decimating entire swathes of enemies with a single blow.

By harnessing the power of such artifacts and honing their combat prowess, players can streamline the process of rune farming, transforming what was once a laborious task into a swift and efficient endeavor.

The Rewards of Perseverance

As players continue to hone their skills and accumulate wealth within Mohgwyn Palace, they will find themselves amply rewarded for their efforts. From rare crafting materials to invaluable treasures, the spoils of victory are plentiful for those who dare to challenge the darkness that lurks within.

Moreover, the experience gained from traversing the treacherous halls of Mohgwyn Palace serves as a testament to the resilience and determination of the Elden Ring adventurer. Each victory brings them one step closer to mastering their craft and overcoming the trials that await them on their journey.

Conclusion

In conclusion, while the practice of rune farming may not be a necessity in Elden Ring, but it serves as a testament to the dedication and perseverance of its players. Whether driven by a desire for power, wealth, or simply the thrill of conquest, adventurers from across The Lands Between flock to locations like Mohgwyn Palace in search of glory and fortune.

MMOexp provides you with cheap Elden Ring Items service, allowing you to be invincible in the battle.

Weapon Rework and Player Empowerment in Skull and Bones

In the ever-evolving world of Skull and Bones, the topic of weapon rework has sparked intense discussion among players eager for more control over their loadouts and gameplay experience. With a desire to inject new life into the game’s combat mechanics, several ideas have emerged to empower players and enhance the customization of their weaponry.

One proposed solution involves the creation of comprehensive plans for each core class weapon, spanning multiple levels of rarity and functionality. From Culverins to Demi-Cannons, players would have access to a range of options within their chosen class, each offering unique attributes and capabilities. By removing all perks from weapons except for the unique damage effects, reload speed, and range, players gain greater flexibility in tailoring their loadouts to suit their playstyle.

Furthermore, the introduction of a leveling system tied to class upgrades would allow players to progressively enhance their weapons, increasing their effectiveness and potency. As players advance through the ranks, they would unlock access to higher-level versions of their chosen weapon, providing a sense of progression and achievement.

In parallel, the concept of customizable perks offers players even greater agency in shaping their combat strategies. By allowing players to select and upgrade perks such as flooding, tearing, and ablaze, Skull and Bones empowers individuals to fine-tune their weapons according to their preferences. This shift towards player-driven customization not only enhances the depth of gameplay but also fosters a greater sense of ownership over one’s arsenal.

A key aspect of this rework proposal lies in tying class upgrades to in-game events. By completing various events of escalating difficulty, players can earn the materials and plans necessary to upgrade their weapons. This not only incentivizes participation in events but also ensures that progression remains tied to player skill and dedication. Additionally, higher-level plans may occasionally drop as rewards from events, offering players the chance to acquire powerful weaponry through luck and perseverance.

This approach not only enriches the gameplay experience but also addresses concerns regarding the lack of meaningful progression and customization in Skull and Bones. By placing greater emphasis on player choice and agency, the proposed weapon rework seeks to reinvigorate combat mechanics and reignite player engagement.

As the community continues to advocate for improvements and enhancements in Skull and Bones, ideas such as these serve as a testament to the passion and creativity of its player base. With a commitment to innovation and player-centric design, Skull and Bones has the potential to evolve into a truly immersive and rewarding experience for all who set sail upon its seas. You need Skull and Bones Items and Silver to make yourself stronger, and mmoexp can help you ride the seas.

The Secrets of Last Epoch: The Ignite Sorcerer

Today, we embark on a journey through the intricate world of Last Epoch, delving into the depths of theory crafting and uncovering the hidden potential of the Ignite Sorcerer. Join me, as we explore the innovative strategies and powerful combinations that breathe new life into this often-overlooked mastery.

The State of Sorcerer in the Last Epoch

Before we dive into the specifics of our build, let’s address the elephant in the room: the perceived underperformance of the Sorcerer class. With the introduction of the Rune Master, many players have flocked to this new powerhouse, leaving Sorcerer somewhat neglected. While Sorcerer boasts inherent strength, Rune Master’s allure has overshadowed it in recent patches. However, within the shadows lies potential, and it’s this potential that we aim to harness today.

Unveiling the Ignite Sorcerer

Our journey begins with a quest for uniqueness. Amidst the sea of Rune Masters, we sought to craft a build exclusive to the Sorcerer, one that capitalizes on its strengths rather than emulating its counterpart. Enter the Ignite Sorcerer—a build that not only challenges the status quo but also breathes new life into the class.

Frostclaw and Elemental Nova: The Dynamic Duo

At the heart of our build lies a symbiotic relationship between Frostclaw and Elemental Nova. While Frostclaw spam into Elemental Nova isn’t a novel concept, our approach brings forth a new level of efficiency and power. By leveraging specific nodes and items, we’ve overcome the mana constraints typically associated with such a setup, paving the way for sustained onslaughts of elemental devastation.

The Mana Conundrum: Solving the Puzzle

Mana management is often the Achilles’ heel of spellcasters, but we’ve cracked the code. Through meticulous optimization and strategic utilization of skill combinations, we’ve mitigated the overwhelming mana costs inherent in our build. By synergizing Meteor with Teleport and leveraging mana regeneration mechanics, we’ve achieved a delicate balance that ensures uninterrupted spellcasting prowess.

Ignite Sorcery: Setting the World Ablaze

With our mana dilemma resolved, we turn our focus to the heart of our build—ignition. Sorcerer boasts considerable ignite duration bonuses within its skill tree, laying the groundwork for a fiery onslaught. By combining this innate strength with specialized items like Fire’s Torch and Calamity, we unleash a torrent of burning fury upon our foes.

The Importance of Area: Amplifying Impact

One of the key components of our build is the emphasis on the area of effect. By investing Last Epoch gold in nodes that expand the reach of our Elemental Nova and ignite effects, we ensure maximum coverage and efficiency. This strategic decision not only bolsters our clearing capabilities but also enhances our single-target damage potential—a crucial aspect often overlooked in AoE-centric builds.

Survivability: Balancing the Scales

No build is complete without adequate defenses, and the Ignite Sorcerer is no exception. Through careful selection of items like Twisted Heart and Bleeding Heart, we fortify our resilience while maintaining offensive prowess. By weaving defensive mechanics into our offensive arsenal, we create a well-rounded character capable of weathering even the most formidable of challenges.

A Journey’s End, A New Beginning

As our adventure draws to a close, we reflect on the trials and triumphs of our journey. The Ignite Sorcerer stands as a testament to innovation and ingenuity, proving that even in the face of adversity, greatness can be achieved. So, fellow travelers, I bid you farewell as you embark on your quests, armed with newfound knowledge and inspiration.

For more of the latest Last Epoch content and guides, click here.

Mastering Horse Breeding Guide in Myth of Empires

In the vast and immersive world of Myth of Empires, mastering the art of horse breeding can be a game-changer. Horses are not just mere mounts in this realm; they are companions, partners in exploration, and even tools of war. Understanding how to breed and nurture these majestic creatures can greatly enhance your gameplay experience. In this guide, we’ll delve deep into the intricacies of horse breeding, covering everything from selecting the right pair of horses to managing their offspring.

Selecting the Right Horses

Before diving into the breeding process, it’s essential to understand what makes a horse desirable. In Myth of Empires, horses come with various stats that determine their effectiveness in different roles. These stats include HP (Health Points), Stamina, Max Speed, Maneuverability, Carry Weight, and more. Higher stats generally translate to better performance.

When selecting horses for breeding, aim for specimens with high stats across the board. Look for horses with at least 700+ Max Speed, 3000+ HP, 300+ Maneuverability, and 200+ Stamina, among other desirable attributes. Additionally, consider their talents, traits, and inheritance, as these factors can significantly influence the quality of offspring.

Understanding Stats and Attributes

Each stat and attribute of a horse serves a specific purpose:

• HP (Health Points): Determines the horse’s overall health and resilience in combat. Higher HP means the horse can withstand more damage before succumbing.
• Stamina: Reflects how long the horse can maintain high-speed movement without tiring out.
• Max Speed: Indicates the horse’s maximum achievable speed when fully accelerated.
• Maneuverability: Determines the horse’s agility and responsiveness to player commands, crucial for navigating tight spaces and evading obstacles.
• Carry Weight: Defines how much weight the horse can carry without being encumbered.
• Life Force: Represents the horse’s vitality and longevity. Breeding and other factors can deplete life force, so it’s essential to manage it wisely.
• Impact Force: Influences how much the horse slows down upon colliding with obstacles or enemies.

Understanding these stats will help you evaluate the potential of each horse and make informed breeding decisions.

Breeding Process

Once you’ve selected compatible horses with desirable traits, it’s time to initiate the breeding process:

  1. Prepare the Stable: Ensure that your stable is well-stocked with food, as breeding and pregnancy consume significant resources.
  2. Select Parent Horses: Choose the two horses you wish to breed and place them in the stable.
  3. Initiate Breeding: Access the mating menu and confirm the pairing of the selected horses.
  4. Wait for Pregnancy: After mating, the female horse may become pregnant, leading to the birth of a foal.

Managing Offspring

Upon successful mating, a foal will be born with inherited traits and stats from its parents. It’s essential to nurture and care for these offspring to maximize their potential:

• Feed and Nurture: Provide adequate food and care for the foal to ensure its healthy growth.
• Train and Develop: Train the foal to improve its stats and unlock new abilities over time.
• Monitor Life Force: Keep an eye on the foal’s life force and avoid overbreeding to prevent depletion.
• Evaluate and Breed Strategically: Assess the offspring’s potential and use them for further breeding to enhance your horse lineage.

Conclusion

Mastering horse breeding in Myth of Empires requires patience, strategy, and a keen understanding of equine genetics. By selecting the right parent horses, managing offspring effectively, and nurturing their growth, you can breed powerful steeds capable of conquering any challenge the game throws your way. So saddle up, venture forth, and embark on a journey of equestrian excellence in the mythical world of Myth of Empires.

For more guides and all the latest news about Myth of Empires, check out MMOexp. You can also enjoy buying cheap MoE Copper Coins service here.

Silver Treasure Trove: A Guide to Quick Wealth in Skull and Bones

In the vast and treacherous seas of Skull and Bones, where danger lurks around every corner and adventure beckons the daring, there exists a secret path to untold riches. For those who find themselves struggling to maintain their Helm and keep up with the demands of their maritime pursuits, fear not, for there is a hidden method to amass Skull and Bones silver at an astonishing rate. Join me as we unveil the secrets of this lucrative venture and embark on a journey to financial prosperity on the high seas.

The Dutchman’s Camp: Gateway to Riches

Our voyage begins at a clandestine location known as the Dutchman’s Camp. Nestled in the shadows of towering cliffs and veiled by mist, this haven serves as the starting point for our quest for silver. Venture forth to this map location and seek out the Rogue Trader who dwells within its confines. Though their whereabouts may vary, you’ll typically find them nestled amidst the rugged terrain, awaiting eager traders seeking to strike a deal.

The Art of Fast Travel: A Key to Efficiency

Now, dear reader, pay heed to this crucial technique: the art of fast travel. Upon conducting your transactions with the Rogue Trader, swiftly navigate to the main menu and initiate a brief hiatus, ensuring you’ve departed from your current server. This brief interlude, though seemingly inconsequential, is essential to resetting the game state and facilitating your return to a fresh server. With practiced precision, re-enter the fray and set sail once more, your coffers brimming with potential.

Navigating the Market: Buying Low, Selling High

As you traverse the tumultuous waters of Skull and Bones, keep a keen eye out for opportunities to maximize your profits. Utilize the double green arrows as your guide, signaling opportune moments to buy and sell. Acquire goods at reduced prices and offload them at inflated rates, capitalizing on the fluctuations of the market to line your pockets with silver.

The Cycle of Wealth: Rinse and Repeat

With each successful transaction, you’ll inch closer to financial sovereignty, but the journey does not end here. Embrace the cycle of wealth, tirelessly repeating the process of acquisition and liquidation to amass a fortune beyond compare. Remember, patience and persistence are the cornerstones of prosperity in these turbulent waters.

Optimizing Your Routes: Maximizing Returns

As you grow accustomed to this newfound method of wealth accumulation, explore alternate routes and trading posts to optimize your earnings further. Seek out locales where demand is high and supply is scarce, exploiting disparities in pricing to your advantage. With each strategic maneuver, you’ll inch ever closer to the pinnacle of success.

A Word of Caution: Proceed with Prudence

While the allure of boundless riches may be enticing, exercise caution in your pursuits. Take heed not to overextend yourself, lest you find your coffers depleted and your ambitions thwarted. Pace yourself accordingly, ensuring a steady and sustainable accumulation of wealth.

Conclusion: A Sea of Opportunity Awaits

In conclusion, dear reader, the seas of Skull and Bones are teeming with opportunity for those bold enough to seize it. Armed with the knowledge gleaned from our expedition, you stand poised to chart a course toward financial prosperity like never before.

By the way, do you want to get Skull and Bones gear quickly? MMOexp.com offers you Skull and Bones items buy the best help. Good luck.