All posts by Russell Bates

The Best OSRS Range Gloves Guide

When it comes to mastering the art of ranged combat in Old School RuneScape (OSRS), wielding powerful bows and crossbows is only part of the equation. Equipping yourself with the best range gloves is equally crucial, as they can greatly enhance your accuracy, increase damage output, and ultimately improve your overall performance on the battlefield. In this guide, we will explore the top range gloves available in OSRS, highlighting their unique features and benefits.

Tips: RSorder​The Premier OSRS Ranged Weapons Guide

Void Knight Gloves:
As one of the most sought-after range gloves in the game, Void Knight Gloves offer a significant boost to both accuracy and damage. These gloves are obtained by completing the Pest Control minigame and are a part of the highly coveted Void Knight set. When worn alongside the other pieces of the set, Void Knight Gloves provide a set bonus that grants an additional 10% accuracy and damage, making them a formidable choice for any ranged combatant.

Barrows Gloves:
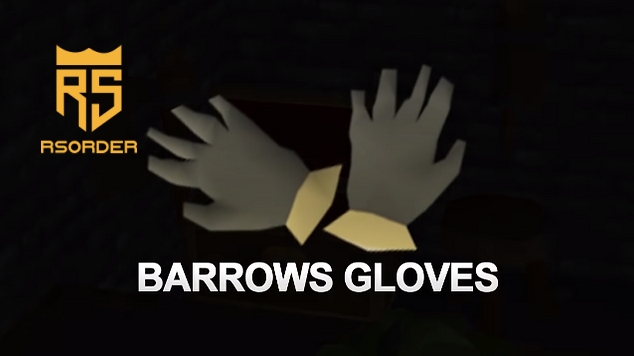
Regarded as one of the best all-around gloves in the game, Barrows Gloves are a prized possession for any OSRS player. To obtain these gloves, players must complete the Recipe for Disaster quest series, which requires a substantial amount of time and effort. However, the reward is well worth it. Barrows Gloves boast impressive stat bonuses, including a +12 range attack bonus, making them a top choice for maximizing accuracy. Additionally, these gloves offer excellent defensive bonuses, making them a versatile option for any combat situation.

Ava’s Device:
While not technically gloves, Ava’s Device is an essential accessory for any ranged combatant. Created by combining Ava’s Accumulator and a Ranging Cape, this device provides an array of benefits. When equipped, Ava’s Device will automatically retrieve and return fired ammunition, saving you valuable time and resources. Additionally, it offers a range attack bonus and provides a chance to salvage ammunition that would have otherwise been lost, making it an invaluable tool for any ranged adventurer.

Black D’hide Vambraces:
For those seeking a more budget-friendly option without sacrificing too much in terms of stats, Black D’hide Vambraces are an excellent choice. These gloves are crafted using black dragon leather and offer a respectable +11 range attack bonus. While they may not provide the same level of bonuses as some of the other gloves on this list, they are readily available and offer a cost-effective solution for improving accuracy and damage for players on a budget.

Selecting the right range gloves in OSRS is crucial for optimizing your ranged combat performance. Whether you’re aiming for the Void Knight Gloves, which provide substantial accuracy and damage bonuses when combined with the full set, or the prestigious Barrows Gloves, known for their excellent all-around stats, each option has its own unique advantages.

Additionally, don’t forget to consider accessories like Ava’s Device, which can greatly improve your efficiency and ammunition management. Finally, for players on a budget, the Black D’hide Vambraces offer a solid range attack bonus without requiring too much OSRS Gold. Choose your range gloves wisely, and watch as your accuracy and damage soar, leading you to victory in your OSRS adventures.

New World – Insights from Creative Director David Verfaillie on Game Balance and More

The latest update for New World is a significant one, arriving after the launch of “Rise of the Angry Earth,” providing players with an opportunity to explore the changes on live servers. The discussion touches on various aspects, including the game’s PvE and PvP balance, the performance of the Flail since the expansion’s release, and other issues the development team is currently addressing.

The conversation delves into the alterations made to the gearing system with the introduction of artifacts, which is a noteworthy aspect of the expansion. A simplified gearing system has been well-received, removing the need for expertise and Umbral Shards. The intention is for players to earn gear based on their activities and the difficulty level they engage with. However, certain aspects, such as PvP gear, Outpost Rush caches, and Arena, have been identified as areas that may require some adjustments.

In terms of gear progression, while it has become faster, the data shows that only approximately 3.2% of players have full 700 gear sets, indicating that the progression rate remains manageable, albeit slightly accelerated.

The addition of named item upgrades has been positively received, providing flexibility to diversify build options. Artifacts, too, have proven effective, and more thematic artifacts are expected with each season, as mentioned in a recent community Q&A. The development team is actively working on issues like the Ankh and continuously monitoring artifacts to ensure they do not disrupt game balance.

The Flail is noted for feeling well-balanced and has gained popularity in Expeditions, becoming the most used weapon at the time of the discussion. If you don’t have enough New World Gold to get this weapon, then what’s the hesitation, go to MMOexp and buy it! Regarding the overall game balance in New World, with the introduction of the first expansion, substantial changes have not yet materialized. The increased options and variety of changes introduced are referred to as being “in flux” by Verfaillie. The next update is expected to provide more data and answers, addressing concerns of overpowered or underpowered elements, and the team remains open to feedback to make further adjustments.

Path of Exile: Explosive Arrow Champion Guide

Path of Exile (PoE) is a free-to-play action role-playing game developed and published by Grinding Gear Games. The game is known for its complex and deep gameplay, as well as its extensive use of randomized items.

This build guide will focus on the Explosive Arrow Champion, a powerful and versatile build that is suitable for both new and experienced players. Explosive Arrow is a bow skill that deals chaos damage to enemies in a targeted area. The Champion Ascendancy provides a number of benefits for Explosive Arrow builds, including increased damage, attack speed, and defense.

Ascendancy

The Explosive Arrow Champion build will use the following Ascendancy points:

  • Fortify: This Ascendancy point grants a 20% chance to fortify on hit. This is a very powerful defensive ability that can help you survive in the late game.
  • Master of Steel: This Ascendancy point increases your attack speed and damage with bows. This is a great choice for Explosive Arrow builds.
  • Unstoppable Hero: This Ascendancy point grants you immunity to stun and knockback. This is another very powerful defensive ability that can help you survive in the late game.
  • Banner: This Ascendancy point grants you the ability to plant a banner that increases your damage and defense. This is a great choice for Explosive Arrow builds, as it can help you clear maps quickly and kill bosses efficiently.

Skills

The Explosive Arrow Champion build will use the following skills:

  • Explosive Arrow: This is the main skill of the build. It deals chaos damage to enemies in a targeted area.
  • Ballista Totem: This skill places a totem that will fire your attacks at nearby enemies. This is a great way to increase your damage output and clear maps quickly.
  • Ancestral Bond: This support gem allows you to summon two additional totems. This is a very important support gem for Explosive Arrow builds, as it allows you to place six totems at a time.
  • Awakened Burning Damage: This support gem increases the burning damage of your Explosive Arrow explosions.
  • Awakened Elemental Damage with Attacks: This support gem increases the elemental damage of your Explosive Arrow explosions.

Gem Setup

The following is a sample gem setup for the Explosive Arrow Champion build:

  • Explosive Arrow: Ballista Totem, Ancestral Bond, Awakened Burning Damage, Awakened Elemental Damage with Attacks, Lifetap
  • Frenzy: Onslaught, Lifetap
  • Blink Arrow: Faster Casting
  • Calling Station: Increased Duration, Faster Casting
  • Infernal Cry: Increased Area of Effect, Faster Casting

Equipment

The Explosive Arrow Champion build does not require any specific unique POE items to function. However, there are a few unique items that can be very beneficial for this build:

  • Asenath’s Chant: This chest piece allows you to cast Explosive Arrow without consuming arrows. This is a huge damage boost for the build.
  • Hopeshredder: This quiver increases the attack speed of your totems. This is another great way to increase your damage output.
  • Victario’s Influence: This amulet increases the maximum number of totems you can summon. This is a great way to increase your damage output and clear maps quickly.

Playstyle

The Explosive Arrow Champion build is very mobile and playstyle. To play the build, simply place your totems around enemies and then watch them die. You can also use Infernal Cry to cover enemies in ash, which will increase the damage of your Explosive Arrow explosions.

For bosses, you can use a single target gem such as Concentrated Effect in place of Ballista Totem. You can also use Blink Arrow to quickly reposition yourself and your totems.

Conclusion

The Explosive Arrow Champion build is a powerful and versatile build that is suitable for both new and experienced players. It is a great choice for players who are looking for a build that is both powerful and mobile.

We hope this article is helpful. For more guidance on Path Of Exile and buying Path Of Exile Currency services, check out MMOexp.

WoW WOTLK Classic Raid Guide: Defeating Lady Death Whisper in Icecrown Citadel

Welcome, fellow adventurers, to a comprehensive guide on conquering one of the challenging encounters in World of Warcraft: Wrath of the Lich King (WOTLK) Classic – Lady Death Whisper in the formidable Icecrown Citadel. In this guide, we will delve deep into the strategies, tactics, and mechanics you need to know to emerge victorious in this battle. Lady Death Whisper is the second encounter in Icecrown Citadel, and by mastering this fight, you’ll open the doors to a multitude of other epic boss battles.

Raid Composition

Before we jump into the details of the encounter, let’s discuss the optimal raid composition for facing Lady Death Whisper. You’ll want to bring three tanks for this fight, but the third tank can be a Death Knight (DK) with some tanking gear since Lady Death Whisper doesn’t hit as hard. Having an extra tank is valuable in case of unexpected situations. The primary purpose of this third tank is to generate significant threats while one of the main tanks handles the additional responsibilities.

Understanding the Encounter

Lady Death Whisper is a complex two-phase fight. In the first phase, your primary goal is to deplete her Mana Shield, which behaves similarly to the Mage’s Mana Shield spell – instead of losing health points, she loses Mana as she takes damage. Once her Mana Shield is depleted, phase two begins.

Phase One – Facing the Mana Shield

In this phase, Lady Death Whisper has several abilities to keep an eye on:

Death and Decay: Lady Death Whisper will cast this under a random player. To avoid taking extra damage, simply move out of its area of effect.

Mind Control: Periodically, she will mind control three players for 12 seconds. This is critical to manage, as players affected by mind control could inadvertently harm the raid.

Shadow Bolts: She randomly targets players with Shadow Bolts. Healers need to keep an eye on this and manage healing accordingly.

Now, let’s discuss the ads that she spawns in this phase. There are two types of ads: Cult Adherents and Fanatics.

Cult Adherents:

These are caster ads and perform various actions:

Curse of Torpor: This curse must be dispelled immediately, as it can disrupt rotations and healing.

Death Chill Bolt and Death Chill Blast: These are potent damage-dealing spells. Try to interrupt them to minimize damage.

Shroud of the Occult: They put up a shield that absorbs damage and prevents spell interruption. You'll need to burn through this shield.

Dark Martyrdom: This ability causes them to explode and damage the raid. There's no way to prevent this, so try to position them away from the raid.

Fanatics:

These are melee mobs with dangerous abilities:

Crotic Strike: Tanks must manage this attack.

Shadow Cleave: A frontal cone attack that deals significant damage to players. Tanks should face the Fanatics away from the raid.

Vampiric Might: This ability increases their damage and healing. It's essential to dispel this buff as quickly as possible to reduce their effectiveness.

Dark Martyrdom: Similar to Cult Adherents, they can explode to deal AoE damage.

It’s crucial to prioritize taking down any resurrected ads, as they gain additional powers and, depending on the ad type, become immune to specific damage types. For instance, casters become immune to magical damage, while Fanatics become lumbering zombies that are immune to physical damage.

Managing the Ads

One more important point about ads is that they must be engaged without causing harm to the raid. Casters should be separated from healers and other casters and should be focused by melee and Hunters. Fanatics, on the other hand, should be handled by casters. This separation is essential to prevent extra raid damage.

Phase Two – Dealing with the Transformed Lady

When Lady Death Whisper’s Mana Shield is depleted, she enters phase two. In this phase, she becomes more mobile and less threatening in terms of mechanics compared to phase one. The ads continue to spawn, but on only one side of the room.

In this phase, you need to focus on the following key mechanics:

Frostbolt Volley: She casts this raid-wide damage ability every 20 seconds. Healers must be prepared to mitigate the damage.

Vengeful Shades: These are purple spirits that spawn randomly throughout the room. They target players and explode upon reaching them, causing substantial damage. Avoiding these shades is crucial to success.

Touch of Insignificance: Lady Death Whisper targets her highest threat tank with this stacking debuff, reducing threat generation. Managing the tank threat in phase two is vital, as it can significantly affect the encounter's outcome.

The Walkthrough

Now that we’ve discussed the mechanics and raid composition, let’s dive into a detailed walkthrough of the encounter.

Phase One:

At the start of the encounter, the raid should engage Lady Death Whisper, with tanks grabbing her and positioning her near the center.

The primary goal in this phase is to manage the ads effectively. The ads from both sides should be funneled between the two pillars without causing harm to the raid.

Healers should position themselves in the back, using their heals to draw aggro from the ads and aid in positioning them effectively.

When mind control is imminent, all cleaving and area-of-effect damage should stop to avoid harming controlled players.

DPS players should be aware of which ads require specific damage types to be taken down and prioritized accordingly.

Be extra cautious about the resurrected ads, which gain immunity to certain damage types and can be extremely dangerous.

Transition to Phase Two:

Before transitioning to phase two, ensure that you’ve cleared the current wave of ads. Pushing Lady Death Whisper into phase two with a fresh set of ads can be disastrous.

Phase Two:

In phase two, the tanks should generate a high threat to secure aggro on Lady Death Whisper. The tank swap mechanic comes into play, with tanks leapfrogging to maintain threat.

The raid should move Lady Death Whisper to the center of the room to facilitate better control.

The additional tank should intercept any ads that spawn, and DPS players should prioritize taking them down.

The critical element in phase two is avoiding the Vengeful Shades. They can wipe the raid, so DPS and healers must be vigilant.

When the tank threat debuff, Touch of Insignificance, is applied, tanks should use their cooldowns to generate as much threat as possible and then leapfrog to maintain aggro.

Tank, Healer, and DPS Tips

Tanks:

Paladins can use their threat-generating abilities to start the encounter effectively.
In phase two, DK tanks can build up Icy Touch charges to generate a high threat.
Tanks should be mindful of the positioning of ads to avoid cleaving the raid.
Watch for Vengeful Shades and move the boss if necessary, but it's primarily the raid's responsibility to avoid them.

Healers:

In phase one, be prepared to handle mind controls and dispel the Curse of Torpor quickly.
Save cooldowns for Frostbolt Volley and when managing Vengeful Shades.
Communicate and work together to ensure the raid's survival.

DPS:

Stop cleaving when mind control is imminent to avoid harming controlled players.
Prioritize ads that require specific damage types.
The primary focus in phase two is avoiding Vengeful Shades, so keep your eyes open and be aware of your surroundings.

Conclusion

Defeating Lady Death Whisper is a significant milestone on your journey through Icecrown Citadel in the WOTLK Classic. By mastering the mechanics and following the strategies outlined in this guide, you’ll be well-prepared to tackle this challenging encounter and progress to the subsequent heroic boss battles. Remember, patience and coordination are key, and avoiding Vengeful Shades in phase two is paramount to your success. Good luck, and may the loot be ever in your favor!

We hope this article will be helpful in defeating Lady Death Whisper. For more guides on WoW WOTLK Classic and the buy WoW WoTLK Classic Gold service, check out MMOexp.

Balancing for Solo and Duo Play: A Complex Dilemma

If the game permits solo and duo play, it raises the question of whether balancing should cater to these modes or if a separate queue should be introduced for crypts to maintain an environment where three-man teams primarily compete against each other.

Various popular games, like League of Legends and Overwatch, have modes like 1v1 and free-for-all. These modes often lack balance, and certain characters tend to outshine others. For instance, it’s uncommon to witness a Mercy winning in a free-for-all mode. The mere existence of these modes doesn’t necessitate them being balanced, especially if they aren’t the central focus of the game.

The challenging part lies in striking a balance. The more you tilt the balance towards solos, the potential reduction in the significance of team synergy and the increased prominence of individual skill become pronounced.

A crucial aspect to address is that every class should be capable of competing against any other class. Without this parity, solo play will inevitably remain unbalanced. In such a scenario, team assistance becomes less relevant since no class possesses a distinct counter. You’d be able to engage in 1v1 situations with any player without the need for team dynamics.

However, introducing counters adds depth. If you’re a ranger facing a fighter, your chances of victory diminish unless you’re aided by a rogue for weak point application, a fellow ranger providing fire arrows, a cleric granting bless, or another fighter intervening and disrupting their advance. This dynamic between team members becomes integral.

Nonetheless, venturing into the trio dungeon on your own or with a partner can feel disheartening, given the inherent challenge and potential for an uneven contest. Yet, it remains a conscious choice rather than a mandatory imposition.

The situation isn’t dissimilar for solo players. They run the risk of encountering opponents who are hard counters, capable of defeating them with minimal effort or possessing immunity to their attacks. This scenario exists because the current balance is tailored for three-person teams.

It’s possible to rebalance for solo play, but that might lead to a reduction in the depth of trios. On the other hand, retaining balance for trios could mean ongoing imbalance for solos. This is a complex decision for developers. Personally, I lean towards prioritizing tactical depth and teamwork over individual one-on-one skill, as well as the reward for winning Dark and Darker Gold. However, others may favor individual skill being paramount, recognizing that this choice comes at the expense of the other approach.