Category Archives: Runescape

The Trials and Triumphs of OSRS Dead Man Mode

In Old School RuneScape’s Dead Man Mode (DMM), where the stakes are higher and the competition fiercer, success and failure often intertwine dramatically. What seems like a triumphant ascent can quickly devolve into a series of setbacks and challenges. My journey through DMM exemplifies this volatile environment, where the pursuit of sigils, combat prowess, and high-value loot is a constant balancing act between risk and reward.

A Rapid Rise and Sudden Setbacks

In the early stages of this Dead Man Mode season, things were looking promising. I reached bracket five in under 24 hours, amassing hundreds of millions in OSRS Gold, achieving high combat stats, and acquiring some of the best sigils in the game. However, the landscape of DMM is ever-shifting, and seemingly insurmountable obstacles emerged. Jagex’s recent removal of sigils from Essence Mining, which had been my primary source of income, was a significant blow. Additionally, the God Wars Dungeon, once a reliable source of loot, had become unsafe due to increased player-killer (PK) activity.

To compound matters, my intended duo partner vanished, leaving me to navigate these challenges alone. This led to a reevaluation of strategies and a shift towards alternative methods for acquiring sigils and sustaining my progress.

Adapting Strategies: From Sigil Hunting to Efficient Training

With Essence Mining off the table, I needed to explore new avenues. One option involved targeting specific dangerous areas to obtain sigils. Despite the risks, these locations offered valuable rewards. One such spot is just a few steps away from a safe zone but remains dangerous due to its proximity to high-level PKers. To mitigate the cost of bolts, which are prohibitively expensive in this mode, I achieved 55 Slayer to access broad bolts—a more affordable option.

In the event of a misstep or unforeseen PK encounter, I planned to use a fallback location where sigils could still be obtained. This included setting up a secondary spot where I could fish for sigils, unlocking Barbarian Fishing to speed up the process and gain strength experience.

Another promising area for sigil acquisition was a spot where the Icy B Sal could be crafted for substantial profits. Here, I also aimed to increase my Construction level to relocate my house for easier access to desert quests, essential for future goals.

Questing and Skill Training: Building the Foundation

The path to long-term success in DMM involves strategic questing and skill training. I started with the Taurus Trap quest, essential for unlocking more advanced content and eventually reaching Desert Treasure, a critical quest for higher-level challenges. Completing these quests not only provided significant rewards but also unlocked areas where PKers were less likely to target me.

In preparation for more ambitious goals, I focused on raising my Smithing and Fletching levels. These skills were among my lowest and needed improvement to enhance my overall efficiency and effectiveness in combat. The goal was to boost these skills by 20-30 levels, providing a solid foundation for tackling more complex challenges.

Key Milestones: Sigils, Upgrades, and Tactical Adjustments

One of the standout moments in this journey was obtaining the Sigil of Prosperity, a valuable drop worth around 4.6 million GP. This success allowed me to upgrade to an Abyssal Whip, a significant improvement despite the inability to train Strength with it. The upgrade increased my XP per hour to 1.5 million, a substantial boost in efficiency.

Further exploration led to the completion of high-value quests, such as Remnick Trials, which provided experience lamps in Attack, Strength, and Defense. These lamps were strategically used to reach 99 Strength and near-99 Attack and Defense, essential for tackling high-level bosses and improving overall combat effectiveness.

Bossing and Unique Drops: The Ultimate Goals

With my stats and gear improved the focus shifted to bossing. The ultimate goal was to obtain unique drops, such as Verus, which had high value and could significantly boost my GP. The challenge was navigating the complex routes to bosses like Vorus, requiring efficient travel and combat strategies.

While trying to secure a Last Recoil Sigil to facilitate safe teleportation, I encountered issues with teleporting back to bosses. This led to adjustments in tactics, including utilizing fallback methods and efficient setups to ensure safety and maximize loot collection.

The Pursuit of the Unique Drop: A Hard-Fought Victory

Despite numerous challenges, including high-level PKers and the difficulties of obtaining rare drops, I persevered. The journey involved extensive bossing sessions and testing different strategies, from using trinkets to adjusting gear setups. Finally, after several hours of intense effort, I secured valuable drops, including a rare Verus item.

Community and Support: A Call for Assistance

Amidst the struggles and successes, a pressing issue arose regarding a fellow player, Carolyn, who had been an integral part of the DMM community. Carolyn’s main account was banned, and recovery efforts were complicated by lost account details. As a community-driven game, OSRS relies on player support, and any assistance in helping Carolyn recover their account would be greatly appreciated.

Conclusion: The Ever-Evolving Dead Man Mode Experience

My experience in Dead Man Mode reflects the dynamic and challenging nature of OSRS. Successes are hard-earned and often overshadowed by unexpected obstacles. The journey through sigil hunting, bossing, and questing is a testament to the resilience and adaptability required in this high-stakes game mode.

As the season progresses, the landscape will continue to evolve, and new strategies and challenges will emerge. Whether facing off against PKers or hunting for rare drops, the essence of Dead Man Mode lies in the relentless pursuit of progress amidst constant change.

The Best OSRS Range Gloves Guide

When it comes to mastering the art of ranged combat in Old School RuneScape (OSRS), wielding powerful bows and crossbows is only part of the equation. Equipping yourself with the best range gloves is equally crucial, as they can greatly enhance your accuracy, increase damage output, and ultimately improve your overall performance on the battlefield. In this guide, we will explore the top range gloves available in OSRS, highlighting their unique features and benefits.

Tips: RSorder – ​The Premier OSRS Ranged Weapons Guide

Void Knight Gloves:
As one of the most sought-after range gloves in the game, Void Knight Gloves offer a significant boost to both accuracy and damage. These gloves are obtained by completing the Pest Control minigame and are a part of the highly coveted Void Knight set. When worn alongside the other pieces of the set, Void Knight Gloves provide a set bonus that grants an additional 10% accuracy and damage, making them a formidable choice for any ranged combatant.

Barrows Gloves:
Regarded as one of the best all-around gloves in the game, Barrows Gloves are a prized possession for any OSRS player. To obtain these gloves, players must complete the Recipe for Disaster quest series, which requires a substantial amount of time and effort. However, the reward is well worth it. Barrows Gloves boast impressive stat bonuses, including a +12 range attack bonus, making them a top choice for maximizing accuracy. Additionally, these gloves offer excellent defensive bonuses, making them a versatile option for any combat situation.

Ava’s Device:
While not technically gloves, Ava’s Device is an essential accessory for any ranged combatant. Created by combining Ava’s Accumulator and a Ranging Cape, this device provides an array of benefits. When equipped, Ava’s Device will automatically retrieve and return fired ammunition, saving you valuable time and resources. Additionally, it offers a range attack bonus and provides a chance to salvage ammunition that would have otherwise been lost, making it an invaluable tool for any ranged adventurer.

Black D’hide Vambraces:
For those seeking a more budget-friendly option without sacrificing too much in terms of stats, Black D’hide Vambraces are an excellent choice. These gloves are crafted using black dragon leather and offer a respectable +11 range attack bonus. While they may not provide the same level of bonuses as some of the other gloves on this list, they are readily available and offer a cost-effective solution for improving accuracy and damage for players on a budget.

Selecting the right range gloves in OSRS is crucial for optimizing your ranged combat performance. Whether you’re aiming for the Void Knight Gloves, which provide substantial accuracy and damage bonuses when combined with the full set, or the prestigious Barrows Gloves, known for their excellent all-around stats, each option has its own unique advantages.

Additionally, don’t forget to consider accessories like Ava’s Device, which can greatly improve your efficiency and ammunition management. Finally, for players on a budget, the Black D’hide Vambraces offer a solid range attack bonus without requiring too much OSRS Gold. Choose your range gloves wisely, and watch as your accuracy and damage soar, leading you to victory in your OSRS adventures.

RuneScape Mole Challenge: Identifying the Deceptive Newbie

RuneScape’s diverse and engaging content, along with its ever-evolving gameplay, has kept players hooked for years. However, one player-driven challenge, in particular, has recently gained popularity and tested the wits of seasoned RuneScape veterans – The Mole Challenge.

The Mole Challenge

In this unique and exhilarating challenge, five hand-selected Elite RuneScape players are presented with a devious task. Among them, four players are seasoned “Theater of Blood” speedrunners, familiar with every aspect of the game’s intricacies. The fifth player, “the Mole,” is an inexperienced newcomer with zero KC (Kill Count) in the Theater of Blood.

The Mole’s primary objective is to deceive the other four players throughout the entire raid without being detected. All players’ real usernames have been changed, ensuring that nobody knows who is who. At the end of the raid, a vote is taken to determine the true identity of the Mole. If the Mole evades detection, they win 100 million OSRS gold (GP). Conversely, if the other players correctly identify the Mole, they each receive 25 million gp as a reward.

Adding a Twist

To avoid the Mole’s deception being too obvious, another twist has been introduced. If any of the four non-Mole players can convince everyone that they are the Mole, they win an additional 100 million GP. This twist introduces an exciting layer of complexity, as it leads to four players pretending to be newbies while only one of them is the real Mole.

The Difficulty of Identifying the Mole

The Mole Challenge becomes a captivating spectacle, as players must strike a delicate balance between pretending to be newbies without jeopardizing the raid’s success. This requires acting convincingly while also maintaining enough competence to keep the raid from failing.

Identifying the Mole is no easy task. The seasoned players must carefully observe their teammates’ actions, gear switches, and combat skills to detect any signs of inconsistency or lack of familiarity with the content. Players who claim to be newbies but demonstrate expert knowledge and execution can be flagged as suspicious.

Deciphering the Mole’s Identity

Throughout the raid, players engage in various tasks, such as managing gear switches, executing combat mechanics, and dealing with challenging boss fights. This offers opportunities for the Mole to slip up or for others to expose themselves while trying to appear as inexperienced as possible.

Players often look for certain signs to identify the Mole. For example, inconsistent gear switches, unusual combat strategies, or movements that deviate from typical newbie behavior can be telltale signs. However, the Mole’s goal is to deceive, so they may purposely make small mistakes to appear more genuine.

The Thrilling Showdown

As the raid progresses and players face the final boss, the suspense builds, and the tension reaches its peak. The Mole’s true identity remains concealed until the climactic end when all players cast their votes and reveal their suspicions. In this critical moment, everyone’s acting skills are put to the test, and alliances may crumble as players try to influence others’ opinions.

Conclusion

The RuneScape Mole Challenge adds an exciting twist to the traditional gameplay, showcasing the unique blend of strategy, deception, and camaraderie that makes the game so captivating. Players are challenged to think critically, analyze their teammates’ actions, and make calculated decisions to outwit the Mole or remain undetected. This engaging social experiment has not only brought entertainment to the RuneScape community but also highlighted the intricacies of human behavior and deception in a virtual world. So, next time you venture into the Theater of Blood, beware of the Mole, for they may be lurking among your ranks, ready to deceive and outwit even the most seasoned adventurers.

OSRS Bloodveld Slayer Guide

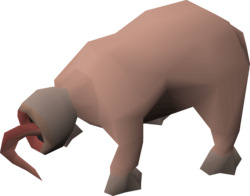
Bloodveld is a dreadful demon that attacks its enemies using its tongue to suck the blood off of them and cause critical damage. You cannot damage a Bloodveld osrs, until or unless you have the sufficient Slayer level. Even though they’re demons, weapons such as Demonbane don’t work against them.

Requirements

In order to face and cause damage to Bloodveld osrs, you are required to have at least level 50 in Slayer. They can only be killed on an assignment, which is given to by one of the following Slayer Masters; Chaeldar, Vannaka, Duradel, and Nieve. After the addition of Mutated Bloodvelds in the Catacombs of Kourend, you now have the option to complete your task in an alternative manner.

Bloodvelds attacks are magic-based melee, so it’s best that you have decent equipment on you that can boost up your magic defense, because, without it, you may end up being dead. An alternative way if you’re not interested in attacking them head-on is using Ranged and safe-spotting them from a distance. Now let’s move onto the next part of this osrs bloodveld slayer guide.

Locations & Safe-spots

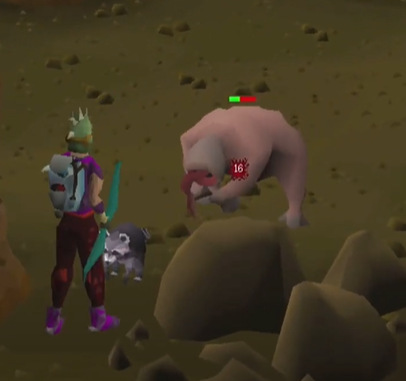
Bloodvelds can be found in various places across OSRS, but if you’re just starting off, then the best place for you would be the Stronghold Slayer Cave tasked by the Slayer Master Nieve. There’s a good safe spot there thanks to the walls within the location that allows you to stay out of sight and attack the creatures.

The second location would be the second floor of the Slayer Tower, where there’s also a safe spot located in the top-right corner of the primary room (the room with a chair). The armor stands there can also be used to face them off from a distance.

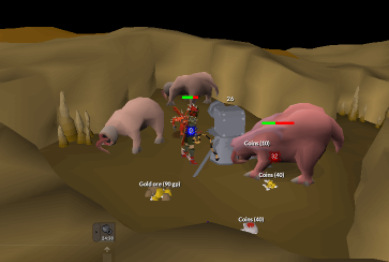
The third location in this osrs bloodveld guide would be the God Wars Dungeon, and you can safe-spot them here by standing behind the rock piles located near the rope exit (or further to the north-eastern section of the area). However, this strategy would require you to have a Saradomin and Zamorak item on you, because that way you can solely focus on the Bloodvelds and no other NPCs will attack you.

The fourth location isn’t really where Bloodvelds are located, but another variant of them, known as Mutated Bloodvelds. To locate them, you’ll have to enter the Catacombs of Kourend, and the layout of the passage is similar to that of Nieve’s Slayer Cave, so you can easily safe-spot them as well. The reason why this location is worth mentioning is that it provided far better experience and loot than the other locations mentioned above. However, we recommend you in this osrs bloodveld slayer guide to have good defensive equipment on you, even though you’re going to safe-spot them because you never know when mis clicks can happen.

Recommended Equipment

The equipment that you take along with you entirely depends on how you’re planning to approach the Bloodvelds to complete your slayer task. If you choose melee, then equip a good magic defense gear, and if you’re going to safe-spot them, then choose a good ranged gear with a powerful offensive bonus for faster kills.

Coming back to melee, protection prayer like Protect from Melee is known to be highly effective, and yet if you still don’t want to do that, then go with the best Dragonhide equipment that you can afford. Other than that, if you’re not interested in obtaining any combat experience, and you’re camping them for the purpose to finish your task, then you can choose to bring your Dwarf Multi Cannon for swift kills. However, you’ll need a good amount of OSRS Gold, because these methods can get a little costly. But if you do for the Multi Cannon method, then do remember to equip a Warriors’ Ring.

OSRS Fishing Money Making Guide

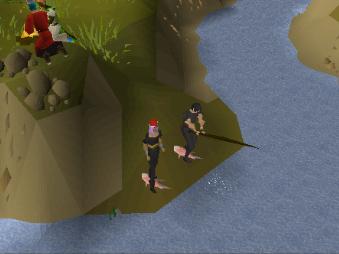
Fishing is the art of catching fish from spots located around Old School RuneScape. You can catch higher-tier fish depending on what your level is. There are different techniques ranging from Net fishing to Rod, Pot, and Harpoon. These caught fish can later be used to train your cooking skill. In the following guide, we’ll be showing you the best way to make OSRS Gold through Fishing. Let’s start!

Dark Crabs

To catch Dark Crabs, you’ll first need to prepare yourself by covering the following requirements. You’ll need high defensive gear against the Player Killers, a slashing weapon to cut through the webs and access the Wilderness lever, a lockpick to escape the Player Killer, and completion of the Wilderness Elite Diary to increase the profit rate per hour. You can catch Dark Crabs at the Wilderness Resource Area.

Minnows

To catch Minnows, you’ll first need to prepare yourself by covering the following requirements. You’ll need the Angler’s Outfit to gain access to where the fishing spot is located, and a Rada’s Blessing for an 8% chance to catch double Minnows. We don’t recommend it if you’re looking for an AFK approach because the spot changes every 15 seconds.

Minnows stack in your inventory, so you won’t have to worry about banking. Once you have a massive number of Minnows, you can exchange them for Sharks. Per 40 Minnows gives you 1 Shark and this can be done through the NPC called Kylie Minnow.

Sacred Eels

To catch Sacred Eels, you’ll need to prepare yourself by covering the following requirements. You’ll need at least 72 Cooking, and you’ll have to complete the Regicide quest. Besides that, you’ll need a Fishing Rod, Bait, and a Knife. The knife is used on the eels to extract Zulrah Scales from them. The amount you get depends on what your cooking level currently is. That’s why we suggest you have a higher level.

Infernal Eels

To catch Infernal Eels, you’ll need to prepare yourself by covering the following requirements. You’ll need at least 25 Herblore for the Oily Fishing Rod and have a Fire Cape to access the Mol Ul Rek city. Besides that, you’ll need a Fishing Rod and Bait to catch them.

You’ll also need a Hammer because you’ll be using it on them to extract Tokkul and sometimes Onyx Bolt Tips as well as Lava Shards. You can save up to 300,000 Tokkuls to purchase an Onyx Gem from the city’s store. This can later be sold for profit at the Grand Exchange.

Swordfish & Lobsters

To catch Swordfish or Lobsters, you’ll need to prepare yourself by covering the following requirements. Make sure you complete the Corsair Curse and Dragon Slayer quest to access a particular place. Besides that, you’ll need a Harpoon or Lobster Pot to catch them. There’s one fishing spot located on Karamja Island, and there’s another that’s in the Corsair Cove Resource Area for which you need to complete the quests mentioned above.

Conclusion

There are several new and old ways you can approach to make Runescape Gold off of Fishing. While it can get boring at times, the end result is worth the time. We hope our guide was helpful. Good luck with your journey!