Throne of Liberty: A Critical Analysis and the Quest for Quality

Throne of Liberty has recently undergone a full release, and players are sharing their experiences with this highly anticipated MMO. The game has seen some improvements since the last review, but there are still areas that leave players less than impressed. In this article, we’ll delve into various aspects of the game, from combat mechanics and questing to Throne and Liberty Lucent monetization and overall user interface, to provide a comprehensive overview.

Combat System: A Mixed Bag

The combat system in Throne of Liberty has seen some changes since the initial review. Players note that the developers have made efforts to transition from the auto-play system to a more interactive combat experience. The addition of new abilities, including a parry mechanic, adds a layer of complexity to engagements. However, despite these improvements, the combat system still falls short of competing with other contemporary MMOs.

One player describes the combat as reminiscent of a mobile game, drawing parallels with the combat system of ArcheAge on mobile. The absence of a dodge roll, present in many other MMOs, is felt keenly by players, although the parry mechanic attempts to compensate for this limitation. The overall consensus is that the combat, while slightly improved, lacks the fluidity and responsiveness found in other MMOs.

Questing: A Mundane Experience

Questing in Throne of Liberty is described as a routine task, with players expressing disappointment in the simplicity of the quests. The mechanics involve approaching a target, pressing a button, and moving on, drawing comparisons to the questing system in modern MMOs like Black Desert Online. The lack of innovation in quest design contributes to a less-than-engaging player experience.

Moreover, the game employs a reward-centric system that constantly showers players with incentives, akin to a gacha or mobile game. This approach, while aiming to encourage player engagement, is criticized for feeling disingenuous and potentially manipulative.

Monetization: The Specter of Pay-to-Win

One of the most significant concerns raised by players revolves around the game’s monetization model. The presence of a battle pass, offering both free and premium tiers, is not inherently problematic. However, the contents of the premium pass, including gold, potions, and upgrade materials, raise suspicions of a pay-to-win structure.

The game’s marketplace, exclusively using a cash shop currency, adds another layer to the pay-to-win debate. While the availability of in-game methods to earn this currency is acknowledged, the reliance on cash shop currency for transactions raises concerns among players.

User Interface: Mobile Game Aesthetics

Throne of Liberty’s user interface has undergone some changes, with improved icons that reflect a more traditional MMO style. However, the overall design still leans heavily towards a mobile game aesthetic, which may not resonate well with players accustomed to the more polished interfaces of PC-oriented MMOs.

Upgrade System: Akin to Mobile Games

The game’s upgrade system, allowing players to enhance abilities and weapons, is likened to the mechanics found in mobile games. While the presence of RNG elements adds a layer of unpredictability, players appreciate that the system appears more restrained compared to other Korean MMOs.

Graphics and Sound Design: A Silver Lining

One redeeming aspect of Throne of Liberty is its graphics and sound design. Players praise the game for its visual appeal and commend the developers for creating an immersive environment. Despite this positive aspect, it’s noted that graphical prowess alone does not compensate for the shortcomings in gameplay and mechanics.

Conclusion: A Generous Two out of Ten

In conclusion, Throne of Liberty receives a modest two out of ten from players who find the game lacking in comparison to its contemporaries. While the graphics and sound design are commendable, the combat system, questing experience, and concerns about pay-to-win aspects contribute to a less-than-favorable overall impression.

The absence of a global release date further adds uncertainty to the game’s future in the Western market. As players await updates and potential improvements, it remains to be seen whether Throne of Liberty can overcome its current limitations and stand out in a highly competitive MMO landscape.

For more of the latest Throne and Liberty content, be sure to keep up to date with MMOexp. Buy cheap TL Lucent through MMOexp website, can get more discounts.

Predictions: WoW Classic Season of Discovery Phase 2 and Beyond

As the WoW Classic Season of Discovery unfolds, the anticipation for future phases and the introduction of new content is palpable among players. While it’s essential to emphasize that this discussion is for enjoyment and not an endorsement of rushing through the current phase, it’s intriguing to explore the possibilities that lie ahead.

One of the primary questions centers around dungeons that may transition into raids. With the current limitation on normal BFD due to its raid status, curiosity arises regarding the level 50 raid and whether all four wings, akin to Stratholme (SM), will be accessible. This prompts speculation about potential dungeon lockouts for leveling dungeons if players engage in excessive spamming.

The prospect of a level 50 zone for PvP battlegrounds becomes a focal point of discussion. Players share their predictions on the introduction of dual spec, speculating that it could be unlocked at level 40. Another query involves the release strategy for level 60 raids—whether they will be introduced simultaneously or follow a phased cadence akin to Classic WoW.

Observations suggest a trend of transforming significant leveling dungeons into raids, exemplified by BFD and the upcoming Gnomeregan raid. This prompts contemplation about the next potential raid, with Sunken Temple being a plausible candidate. However, concerns are raised about the dungeon’s repetitive nature, and suggestions emerge for innovative approaches, such as fighting a boss multiple times with varied vulnerabilities or mechanics.

The mention of level 60 raids invokes speculation about Karazhan, potentially slated for Phase 4. Questions linger about the possibility of revisiting BRD as a raid, considering its prominence in the pre-BiS loot landscape. The challenge arises from BRD’s substantial role in the existing Classic loot structure, prompting considerations of loot rebalancing or the introduction of two new level 60 raids to avoid redundancy.

While these speculations ignite excitement, it’s important to approach them with the understanding that WoW Classic Season of Discovery unfolds in its own time. The developers’ decisions and the evolving player experience will shape the trajectory of the game. For now, players can relish the current content, share theories, and eagerly await the official revelations that will shape the future of WoW Classic Season of Discovery.

WoW Classic Season of Discovery is great game, buy WoW Classic SoD Gold at mmoexp.com at once, professional and reliable.

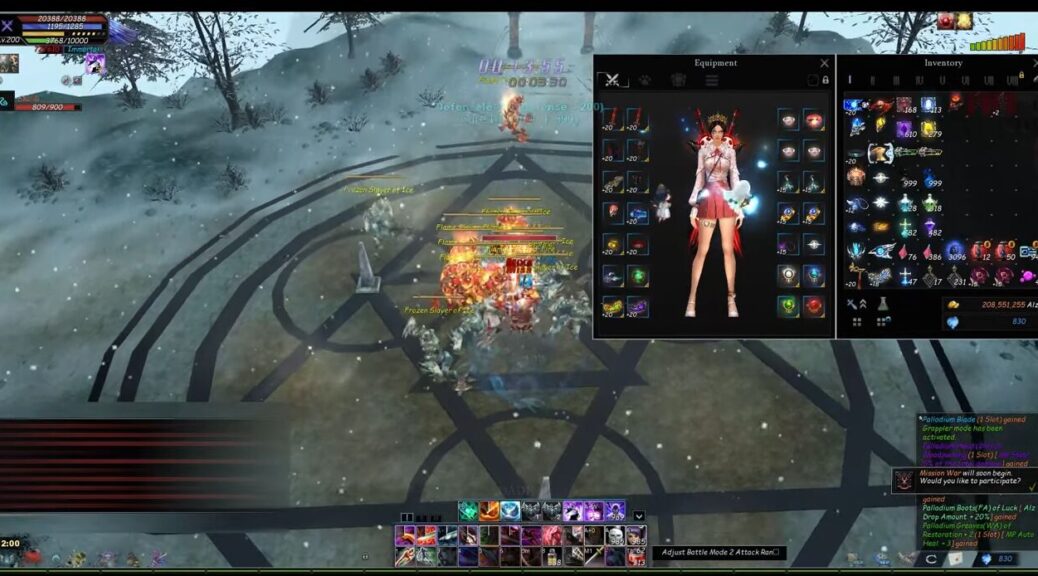
Cabal Beginners’ Essential Guide: Comprehensive Archer Experience

Preface: This guide on “Amplification and Fatal Damage” attributes is equally applicable to other professions.

Having played Cabal for three years, progressing from a small character to an experienced archer (a bit self-indulgent, but I believe in my capabilities), I now share my experiences for the benefit of everyone’s progress.

Archer: In Cabal, speed is its absolute advantage. While burst damage may not be its strongest suit, in terms of DPS (Damage Per Second), archers are undoubtedly the most stable and powerful.

Firstly, players need to consider the role of their archer: PK (Player Killing) or dungeons?

PK: Attack should be the primary consideration, as stable and efficient sustained high output is the key to victory. The best defense is a good offense. However, due to the emphasis on high output, low defense becomes its fatal weakness. It’s crucial not to engage in direct confrontation (combo) with opponents unless victory is assured, or in a last-ditch effort. Despite its defensive vulnerability, archers can compensate with their evasion attribute. In my PK experience, the conclusion is clear: before ensuring the ability to defeat the enemy, leverage the advantage of attack speed for guerrilla warfare. Then, seize the opportunity to combo the opponent.

Dungeons: As mentioned earlier, the weakness of archers lies in their defense, but evasion helps compensate for this. However, in higher-level dungeons from level 105 onwards, the high damage output and accuracy of BOSS or mini-BOSS become archers’ Achilles’ heel. Yet, archers possess 9-10 grid ranged attacks and powerful recovery abilities (Healing Light’s healing + significant HP recovery in an instant). This is why experienced players have always said that archers are resilient. In summary, when it comes to dungeons, unless you have a significant equipment advantage, avoid soloing dungeons. The consumption is too high, and you may find your health at half when you’re preparing to combo, and healing won’t be enough. Unless your equipment has an absolute advantage, soloing dungeons can be risky.

Archer: Silent guardian when not unleashing power; Catastrophe when power is unleashed.

An archer is like a chess cannon, firing from a distance. The mountain is your own shield – fierce, dual shots.

Regarding the choice of archer skills:

My attack skills are: Lethal Shot 20, Arrow of Shadow 20, Spear of Earth 18, Earth Compression 18, Poison Arrow 20, Distorted Space 12, Starfall 20.

The skill amplifications are: 145%, 185%, 175%, 185%, 185%, 175%, 195%.

Note: The skill amplification values are based on the old Cabal display data. Although the current display may be different, the difference in amplification should be the same.

Why choose these skills? Let me analyze my choices:

Firstly, Arrow of Shadow, Spear of Earth, Earth Compression, Poison Arrow, and Starfall. Among these skills, only Spear of Earth has an amplification of 175%, while the amplifications of other skills are 185% and 195%.

So, why Lethal Shot and Distorted Space? Lethal Shot comes with a 50% lethal rate and 105% critical damage, while Distorted Space brings an 85% stun for 5 seconds.

Note: Regarding the stun effect, it begins counting when the skill is accurately released on the enemy to deal damage (similar to knockdown and knockback effects).

Calculated this way, when the opponent is stunned by Distorted Space, half of the skill’s duration has already passed. With a duration of 2.3 seconds, half is 1.2 seconds. This means that after Distorted Space is released, the opponent will be at your mercy for 3 seconds.

For high-tier auxiliary skills, there are Thundering Shot and Thunder Compression. However, I’ll explain why I didn’t choose them below:

Thundering Shot has the longest release time among gun skills (1.5 seconds), equivalent to the release time of a compressed skill. The amplification of Thundering Shot 18 and Spear of Earth 18 is the same at 185%, but the additional damage is different.

Similarly, Thunder Compression 18 has a release time of 1.8 seconds, but its actual effect doesn’t surpass the damage of Poison Arrow (because Poison Arrow has additional damage every 2.3 seconds over 10 seconds).

The above is my choice of skills. Below is the arrangement of attack skills:

As mentioned earlier, archers rely on the advantage of speed to achieve high output damage.

  1. Continuous Combo: Lethal Shot 20 / Arrow of Shadow 20 / Spear of Earth 18 / Earth Compression 18… These four skills can be used in the fastest combo cycle (by fastest combo, I mean that you can press the skill key to release the skill as soon as the combo bar reaches the point where the skill can be released).
  2. Non-Combo: Lethal Shot 20 / Arrow of Shadow 20 / Spear of Earth 18. These three skills can be used in a cycle every 4 seconds.
  3. Guerrilla Warfare: Lethal Shot 20 / Blink / Arrow of Shadow 20 / Blink / Dash. These five skills can be used in a cycle.
  4. Guerrilla Warfare 2: Lethal Shot 20 / Blink / Dash / Arrow of Shadow 20 / Blink / Dash. These six skills can be used in a cycle.

This is the basic routine I recommend, but the essence of martial arts in every school has only a few moves, but the methods of use are varied. The specifics depend on your own accumulation of experience through practice.

Now, let’s address the most concerning topic: equipment selection.

Whether archers should follow the amplification route or the critical strike route is a favorite and seemingly unnecessary discussion. In the game experience section (original MOLI game Cabal forum), there is detailed research on amplification and critical damage data. Unfortunately, the links to those two posts cannot be opened now. Only the poster himself can open them by searching for his own essential posts on the MOLI game forum.

The conclusion drawn is:

Amplification adds a bonus to the basic attack power. In other words, the higher your attack, the more pronounced the amplification effect.

Note: The output obtained after amplification will be offset by the opponent’s defense.

Critical damage adds a bonus to the actual damage value. In other words, the higher your actual damage against the opponent, the higher your critical damage bonus.

Currently, no one has determined the upper limit of amplification. The upper limit of critical damage is 240%.

Here, let me share an example related to critical damage that I have practiced:

During the national war, with the heritage weapon, when sniper mode and aura mode were not activated, Lethal Shot 20 produced higher critical damage than Arrow of Shadow 20, Spear of Earth 18, and Earth Compression 18.

However, when sniper mode was activated and aura mode exploded, the critical damage of Arrow of Shadow 20, Spear of Earth 18, and Earth Compression 18 was higher than Lethal Shot 20, because the upper limit of critical damage is 240%.

The critical damage possessed by Arrow of Shadow, Spear of Earth, and Earth Compression:

Heritage 70%, Aura mode 18%, Precision Sniper 90%, Self 20%, Jewelry and helmet 35 (Feyin +7, +10 ring pair, helmet 5%) = 233%.

The critical damage inherent in Lethal Shot 20, under the above conditions, results in a critical damage bonus of 338%. However, the upper limit of critical damage is 240%.

At this point, the critical damage has basically reached its limit. The determining factor now depends on the level of amplification.

Lethal Shot 20 (145), Arrow of Shadow 20 (185), Spear of Earth 18 (175), Earth Compression 18 (185).

The difference is 35%-45% in amplification, directly affecting the final damage value and, consequently, the effectiveness of critical damage.

This is why the situation I mentioned in the example occurred. Specific equipment configurations depend on the player.

I’ll say this: from the current attack perspective, achieving 65%-75% amplification is already quite good.

A higher level is 100% amplification. But if it’s even higher, I can say this: you have too much money. It’s just data, not very useful.

Because your attack is only this much, for example, 1000 attacks, skill amplification 185%.

If the equipment is 100%, your total amplification is 285%.

Output should be 2850 plus skill additional damage.

If the equipment is 115% amplification, then your total amplification is 300%.

Your output is 3000 plus skill additional damage.

For the sake of this 15% amplification, your investment can probably get you two sets of 285% total amplification.

Now, there’s a big misconception that many people have:

Amplification is most noticeable between 100% and 200%.

However, the additional 100% amplification at 300% compared to 200% does not double the output obtained at 200% amplification (similar to the experience bonus in VIP).

Critical damage doesn’t ignore defense because there’s a basic output first, then after offsetting the opponent’s defense, actual damage is obtained. Critical damage adds a bonus to the actual damage value.

(Understand this short paragraph on your own. If you can’t, consider it unsaid.)

To help everyone better understand the importance of reasonable combination of amplification and critical damage, I’ll give an example.

Base attack 1000, total amplification 300%, no critical damage, monster defense 1000.

In the case of critical damage, the actual damage to the monster is:

1000×3−1000=2000+2000×20%=2400.1000×3−1000=2000+2000×20%=2400.

Base attack 1000, total amplification 250%, critical damage 50%, monster defense 1000.

In the case of critical damage, the actual damage to the monster is:

1000×2.5−1000=1500+1500×(50%+20%)=2550.1000×2.5−1000=1500+1500×(50%+20%)=2550.

Which do you think has a better cost-effectiveness between 300% amplification and 250% amplification with 50% critical damage?

Let me make one more point clear: Amplification increases your basic output, thus increasing the actual damage value. This is why critical damage becomes more effective with higher critical damage bonuses.

The equipment mentioned above is what I used during the time of honor + excellence. At that time, MOLI game had already introduced the Wind Chime equipment set with 60 amplification through the roulette.

Although the latter part of the article mentions equipment amplification and critical damage choices, which may not be entirely practical for the 180-220 amplification era, there is still relevance. It depends on everyone’s own understanding.

However, it is precisely applicable to Cabal 2 now. As long as there won’t be another 100-200+ amplification Wind Chime set, the equipment matching suggestions mentioned in my article can still be used.

You also need to use your brain in the game, figure out how to spend the least to get the most benefits. This is what is called cost-effectiveness.

Recommend the best seller of Cabal Mobile Gems – MMOexp.com, more other service here, welcome.

A Khajiit Warden Build Guide in The Elder Scrolls Online

The world of Tamriel is vast and filled with wonders, and for those seeking a unique and versatile playstyle, the magicka-based Warden, or “Magden,” is an excellent choice. In this guide, we’ll delve into a carefully crafted Khajiit Warden build that balances offense and defense(ESO gold for sale buy equipment), making it an ideal choice for both solo adventures and group play in The Elder Scrolls Online (ESO).

Choosing the Khajiit Race

The first crucial decision in creating a Magden build is choosing the right race, and in this case, the Khajiit stands out as the preferred choice. The Khajiit’s racial passives provide a perfect balance between stamina and magicka benefits, enhancing both damage and recovery. With increased damage and recovery capabilities, Khajiit becomes the optimal choice for players who enjoy switching between stamina and magicka skills seamlessly.

Attributes Allocation

Efficiently distributing attribute points is key to maximizing your character’s potential. For this Khajiit Warden build, allocate 37 points to magicka and 27 points to health. This distribution ensures a substantial magicka pool of 21.8k, a healthy health pool of 31.7k, and a respectable stamina pool of 16.3k.

Choosing the Warrior Mundus Stone and Jewels of Misrule Food

Enhancing your weapon damage is crucial for this build, and the Warrior Mundus Stone does just that by increasing your weapon damage. Complementing this choice, Jewels of Misrule food boosts your max health by 3927 and increases both your stamina and magicka recovery by 357.

Embracing Vampirism

Becoming a vampire adds an extra layer of strategy to your gameplay. The lower your health, the tankier you become, thanks to the vampire’s passive abilities. This synergizes well with the Khajiit’s natural strengths, allowing you to take advantage of your enhanced damage output while maintaining a durable defense.

Gear Setup

Blood Spawn Set: Unconventional but effective, the Blood Spawn set offers both tankiness and ultimate generation. The set's two-piece bonus increases your physical and spell resistance by 3700 when you take damage, providing excellent overall survivability.

Dragonguard Set: This set is split between the front and back bars. The front bar includes light gloves and an impenetrable sash, offering increased max magicka, offensive penetration, and magicka recovery. This set significantly boosts your damage potential.

Trainee Set: To maximize your max health, incorporate a heavy, reinforced Curass of the Trainee into your build. This set complements your overall survivability without sacrificing damage.

Retro Vitality Set: Vital for sustain, the Retro Vitality set includes an amulet, a ring, and a ring. With an infused trait and weapon/spell damage enchantments, this set contributes to both damage and healing capabilities.

Pale Order Ring: In solo play, the Pale Order ring proves invaluable for its substantial self-healing capabilities. The infused trait and weapon/spell damage enchantment further enhance your offensive potential.

Weapons of Choice

Front Bar: Opt for a Dragonguard ice staff in the charged trait with a magic damage glyph. This setup boosts your overall sustain and increases your damage output.

Back Bar: Utilize an ice staff for Retro Vitality in the defending trait with an increased weapon and spell damage enchantment. This configuration enhances your survivability while still contributing to damage.

Skills Overview

Force Pulse: Your main spam ability, dealing flame, shock, and frost damage while applying additional magic damage to afflicted enemies.

Bird of Prey: Provides major Expedition, granting increased movement speed and immunity to snares. Also offers minor Berserk for a 5% boost to Damage Done.

Blue Betty: Bestowing major Brutality and Sorcery, Blue Betty increases weapon and spell damage by 20 while removing one negative effect every five seconds.

Deep Fissure: A powerful burst damage skill that also applies major and minor breach, reducing enemy physical and spell resistance by a total of 9k.

Fetcher Infection: Inflicts minor vulnerability, enhancing damage output, and provides an additional source of damage over time.

Dawnbreaker: A front bar ultimate, contributing to your burst damage potential when combined with Deep Fissure and Force Pulse.

Arctic Blast: While the guide mentions it, considering the recent changes, Polar Wind might be a more suitable morph for burst healing.

Lotus Blossom: A source of major Prophecy and Savagery, increasing critical hit chances, and offering self-healing on light or heavy attacks.

Resolving Vigor: A crucial five-second heal over time with the added benefit of minor Resolve for increased resistance.

Leeching Vines: Another heal over time ability that also provides minor lifesteal, further boosting your sustainability.

Ice Fortress: Grants major Resolve and minor Protection, enhancing your tankiness and activating Retro Vitality.

Northern Storm: A powerful back bar ultimate that deals significant damage, increases weapon and spell damage, and reduces damage taken through major Protection.

Champion Points

Blue Tree:

Focus: Boosts your healing effectiveness.
Mending: Increases the healing received.
Master-at-Arms: Augments your damage output.
Cleansing: Enhances the effectiveness of cleansing effects.
Revival: Improves the healing received when revived.
Ironclad: Enhances your resistance to direct damage.

Red Tree:

Sustained by Suffering: Increases your healing received while below 50% health.
Revival Instincts: Enhances the duration of your damage shield.
Pain's Refuge: Improves the effectiveness of your damage shield.
Bastion: Improves the strength of your damage shield (consider replacing with Celerity for increased speed).

Green Tree:

Rationer: Increases the duration of your drinks.
Liquid Efficiency: Reduces the cost of your drinks.
Break Free: Reduces the cost of breaking free from crowd control effects.

Conclusion

This Khajiit Warden build offers a perfect blend of offense and defense, making it an exciting choice for ESO players. Experiment with the suggested gear, skills, and champion points, adapting them to your playstyle for the best results. Whether you’re tackling solo content or engaging in group activities, mastering the Magden promises an immersive and rewarding experience in The Elder Scrolls Online.

We hope this article is helpful. For more guidance on The Elder Scrolls Online and buying Elder Scrolls Online gold services, check out MMOexp.

FC 24 – A peculiar phenomenon

Has anyone else experienced a peculiar phenomenon where opponents seem to undergo a dramatic improvement halfway through a match? This weekend in the Weekend League, I found myself consistently taking a 2-0 lead in most matches. My opponents would leave substantial gaps in their defense, struggling in their offensive endeavors. However, almost like a switch being flipped, my adversaries would suddenly exhibit a heightened level of skill, turning the tide and ultimately besting me with scores like 2-5 or 2-4.

While I’m aware of the concept of scripting, this phenomenon feels distinct. It’s akin to a scenario where your opponent transforms into a seasoned pro midway through the game, leaving you bewildered, as if they’ve handed the controller to a more adept player—almost like a little brother giving control to his big brother.

A particularly confounding instance occurred when I found myself with a comfortable 4-1 lead in the 50th minute. Up until that point, my opponent posed minimal threat, with their solitary goal being an anomaly. However, in a puzzling turn of events, they managed to score five times in a mere 15 in-game minutes, ultimately securing a 4-6 victory. The sudden shift in momentum left me scratching my head, unable to discern the catalyst for such a drastic transformation.

An observable pattern emerges in these situations, typically coinciding with opponents adopting an all-out, nothing-to-lose strategy, characterized by aggressive, high-pressure tactics. It’s as if they unleash a relentless assault, going hell-for-leather, which leads to a surge in their performance. While I may not fully subscribe to the concept of Dynamic Difficulty Adjustment (DDA), there’s a firm belief that automatic high-pressure tactics exert a disproportionate influence, causing player behavior to become erratic and challenging to navigate.

The skepticism towards DDA aside, there’s a conviction that the prominence of automatic high-pressure tactics can significantly impact the outcome of a match. The in-game players, influenced by this tactical shift, may exhibit behaviors that border on the absurd, complicating the task of navigating through the pressure and interceptions. This is particularly evident when facing players like Dembele and Griezmann, whose relentless pursuit and quick interceptions contribute to weariness and frustration, ultimately leading to defensive lapses.

While conceding goals during a pressurized onslaught is not a novel concept, the contention here is that the intensity and influence of these automatic high-pressure tactics go beyond reasonable bounds. Struggling to defend becomes not just a matter of tactical prowess but a battle against the overwhelming impact of relentless pressure, making it difficult for many to maintain composure and thwart the constant threat posed by skilled opponents employing these tactics.

The call for a balance in the influence of high-pressure tactics is palpable. It’s suggested that if this aspect were to be appropriately calibrated, a more even playing field would emerge, providing defenders with a fairer chance to withstand the relentless onslaught. A significant number of goals conceded are attributed to the persistent attempts to play through a relentless press, a strategy that often leaves players fatigued and exasperated in the face of relentless pressure.

In navigating the complex landscape of FIFA gameplay, it becomes imperative to scrutinize not only individual skill but also the impact of overarching tactical elements that can sway the course of a match. The enigma of opponents metamorphosing into formidable adversaries, particularly under the influence of automatic high-pressure tactics, adds an extra layer of complexity to the gameplay experience. As the community continues to grapple with these challenges, the quest for a more balanced and nuanced playing environment remains an ongoing pursuit.

Thank you for reading, FC 24 guides and FC 24 Coins for sale at mmoexp.com, welcome to our shop – THANKSGIVING AND BLACKFRIDAY MADNESS SALE Now.