
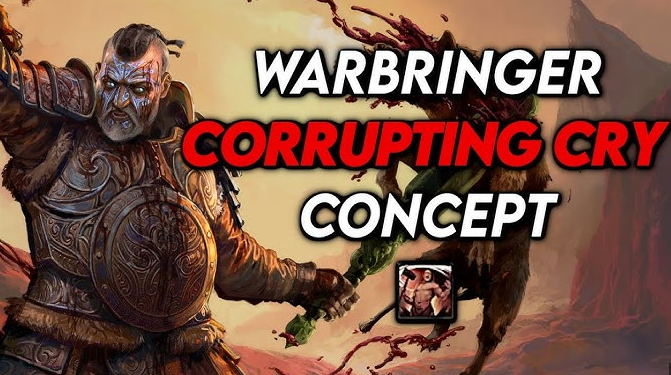
Path of Exile 2 Patch 0.3.1: Skadoosh’s Corrupting Cry Warbringer Build

The Corrupting Cry Warbringer build in Path of Exile 2 (PoE 2) patch 0.3.1 is one of the most creative strength-stacking setups in the entire Warlord archetype lineup. Developed by Skadoosh, this build takes full advantage of Seismic Cry, Infernal Cry, and the support gem Corrupting Cry to unleash massive damage over time, screen-wide explosions, and endless totem summons. With the reworked warcry system and the introduction of new charge-generation mechanics, this build combines high damage, durability, and simplicity – all wrapped in a one-button warcry playstyle that feels both powerful and chaotic.

Whether you’re starting fresh, upgrading from an endgame setup, or chasing Uber-tier content, this build offers flexibility and consistent scaling through the combination of warcry speed, strength stacking, and clever weapon swapping.

Build Concept and Overview

At its core, the Corrupting Cry Warbringer build revolves around applying Corrupted Blood through Corrupting Cry-supported warcries like Seismic Cry and Infernal Cry. Each cry applies a stack of Corrupted Blood – dealing 25% of your total Strength as physical damage per second for 5 seconds, stacking up to 10 times. This means the build can output 250% of your Strength per second in damage over time, creating devastating screen-wide effects as enemies melt under overlapping stacks.

To further enhance this, the build uses Hateforge, Raging Cry, Roaring Cries, and two Guatelitzi’s Soul Core of Endurance charms to produce massive Endurance Charge generation. This allows the summoning of up to 14 Ancestral Warrior Totems back-to-back – effectively maintaining permanent offensive pressure while you warcry your way through mobs and bosses.

In essence, the build is an elegant mix of totem automation and strength-based warcry abuse that thrives on clever Path of Exile 2 Items interactions.

How It Works

The synergy begins with Corrupting Cry – a gem that links to your warcries, causing them to inflict Corrupted Blood. On paper, the setup seems simple, but its power comes from Warcaller’s Bellow, the Warbringer ascendancy that completely removes warcry cooldowns. This allows you to spam Seismic Cry continuously, applying stacks of Corrupted Blood nearly instantaneously.

However, the build would struggle with mana and survivability if not for several key passives and item interactions:

·Urgent Call and Blood Magic on the passive tree convert warcry mana costs into life, letting you sustain through massive health pools.

·Second Wind III unexpectedly interacts with warcries to provide burst life recovery each time you shout.

·The high Strength scaling inherently grants +2 Life per point, meaning life cost remains sustainable.

When transitioning into single-target fights, Shockwave Totem, Forge Hammer, and Earthquake take over. The weapon swap mechanic (now instant in 0.3.0+) lets you switch between your totem and shield sets seamlessly – maximizing both damage and defense.

Weapon Set 1 focuses on Seismic Cry and Infernal Cry for damage and charge generation.

Weapon Set 2 focuses on Ancestral Warrior Totem and Shockwave Totem, scaling skill duration and melee damage.

Essentially, you shout, spawn totems, and let the overlapping fissures, jagged ground, and explosions from Shockwave Totem and Forge Hammer detonate everything in range.

Strengths and Weaknesses

Strengths:

·One-button, screen-clearing gameplay – massive AoE from warcries.

·Passive and automatic damage through Corrupted Blood.

·Exploding corpses prevent corpse-based mechanics.

·High durability thanks to huge Strength scaling and Endurance Charges.

·Cheap to get started – only a few key uniques required.

·Works with or without Hateforge (but shines with it).

Weaknesses:

·Slow movement speed – the “Warrior life.”

·Heavy visual lag with 14+ totems active.

·Extremely loud due to constant warcries.

·Requires manual weapon swap setup for optimal efficiency.

Gear and Stat Priorities

For gearing, your main goals are Strength, Resistances, and Life. Secondary stats like movement speed and armor add quality of life and survivability.

Priority List:

1. +Strength on every possible slot.

2. Maximum Life on armor, boots, and rings.

3. Elemental Resistance capped at 75% (Chaos ideally 65-75%).

4. Movement Speed on boots (at least 20%).

5. Armor and Block Chance scaling for defense.

Key Uniques & Setup:

·Hateforge – Enables back-to-back totem summoning with Rage synergy.

·From Nothing + Avatar of Fire – Mandatory for accessing Roaring Cries.

·Constricting Command – Reduces the surrounding enemy requirement for warcries.

·Guatelitzi’s Soul Core of Endurance (x2) – Generates Endurance Charges efficiently.

·Fortified Location – Ideal amulet anointment for tankiness.

Optional gear like Astramentis or Gold Rings can provide rarity boosts for farming while maintaining the necessary Strength threshold.

Skill Setup

Main Skills (Weapon Set 1):

·Seismic Cry (linked to Corrupting Cry, Raging Cry, Infernal Cry)

·Fortifying Cry – Adds extra mitigation.

Totem Setup (Weapon Set 2):

·Ancestral Warrior Totem

·Shockwave Totem

·Forge Hammer (linked to Jagged Ground I or Rakiata’s Flow)

Support Skills:

·Charge Regulation – Replaces Dread Banner for consistent uptime.

·Earthquake – Provides jagged ground for Shockwave Totem detonations.

Pro Tip:

Hold your Seismic Cry key and tap Ancestral Warrior Totem to maximize totem uptime. Using left-click for Seismic Cry and right-click for Ancestral Warrior Totem is the optimal setup.

Endgame Scaling

At Uber’s endgame, the build evolves around Hateforge interactions. You’ll maintain a rotation of Raging Cry and Roaring Cries to continuously generate Endurance Charges and spam totems. Weapon swapping lets you drop 10+ totems instantly while still benefiting from shield defenses.

Patch 0.3.1 buffs to warcry gems and the addition of Fortifying Cry further empower this build, while attribute requirement reductions make gem management easier than ever.

Conclusion

Skadoosh’s Corrupting Cry Warbringer Build is a masterclass in Path of Exile 2 creativity – combining brute strength with intricate mechanics like Corrupted Blood stacking, instant weapon swaps, and charge-based totem spamming. It’s one of the most satisfying builds to pilot, capable of clearing the screen with a single button while remaining durable enough for Uber content.

If you enjoy off-meta builds, explosive visuals, and the feeling of commanding an army of war totems while shouting enemies into oblivion – this is your go-to choice for Patch 0.3.1.

Consider boosting your progress with top-tier gear and currency – you can easily buy POE2 Currency from eld.gg to fast-track your endgame setup.

Diablo 4 Season 9:Top 5 Thorns Builds to Try

Thorns in Diablo 4 has evolved from a purely defensive mechanic into a fully offensive strategy. Season 9 introduces unique items and updates that let Thorns become a core damage-dealing playstyle across multiple classes. Whether you want a tanky bruiser, a poison-spewing hybrid, or a legion of thorn-armored minions, these builds can compete with the game strongest setups.

Here are the five best Thorns builds to dominate Torment II and III content in Season 9.

1.Bash Barbarian – The Classic Thorns Juggernaut

    The Bash Barbarian is a durable, reliable Thorns build that excels at boss fights and crowd control. Using Bash and Ground Stomp, combined with Earthquake aspects and Challenging Shout, you’ll reflect enormous damage while stunning enemies.Protect your Diablo 4 gold with the trusted services of MMOexp today.

    Highlights:

    High single-target damage, perfect for Pit pushing

    Tanky with self-sustaining shouts and defensive mitigation

    Razorplate amplifies passive Thorns damage

    Key Gear & Aspects:

    Razorplate – core for Thorns output

    Ancient’s Oath – boosts Steel Grasp chains

    Aspect of the Ancestral Force

    Bold Chieftain’s Aspect – reduces shout cooldowns

    2.Poison Thorns Spiritborn (Rake Variant)

      This hybrid build merges Thorns with Poison damage, providing incredible AoE and burst potential. Balazan’s Maxtlatl converts Thorns into Poison, while Quill Volley or Rake delivers fast attacks. When paired with Noxious Resonance, it becomes a screen-clearing powerhouse.

      Highlights:

      Explosive poison damage via Thorns procs

      Scales well with Crit Chance and Attack Speed

      Ideal for elites and bosses

      Key Gear & Aspects:

      Balazan Maxtlatl – converts Thorns to Poison

      Loyalty Mantle – doubles Spirit Hall bonuses

      Razorplate

      Aspect of Plains Power

      Fell Soothsayer Aspect

      3.Rock Splitter Gorilla Spiritborn

        The Gorilla Spiritborn triggers Thorns through Gorilla Spirit Skills, producing massive damage bursts while remaining tanky. Gorilla x2 Spirit Halls and Loyalty Mantle help you reflect 100% Thorns damage while maintaining a defensive barrier.

        Highlights:

        Massive Thorns bursts from Gorilla skills

        Tanky and consistent, perfect for solo play

        Smooth rotations and strong battlefield control

        Key Gear & Aspects:

        Razorplate

        Balazan Maxtlatl

        Loyalty Mantle

        Sepazontec – boosts Thorns uptime

        Aspect of the Moonrise

        Seal of Denial – adds Barrier and Fortify scaling with Thorns

        4.Leap Thorns Barbarian

          This build blends mobility and Thorns damage, letting you Leap directly into mobs while reflecting damage. By using Fury generation, Challenging Shout, and Revenge Glyphs, you maintain high damage while staying agile.

          Highlights:

          Highly mobile Thorns build

          Flexible, ideal for clearing dense packs

          Fury-spending scales Thorns damage efficiently

          Key Gear & Aspects:

          Razorplate

          Barbed Carapace – Fury-based Thorns scaling

          Outburst – Thorns scales with max life

          Needlefare Aspect – extra Thorns procs

          Death Wish Aspect – boosts damage while Berserking

          5.Thorns Minion Necromancer

            The Thorns Minion Necromancer lets your summons do the heavy lifting. With Spiked Armor, Razorplate, and the Book of the Dead, your minions inherit your Thorns damage, letting skeletons and golems punish enemies while you stay safe.

            Highlights:

            Minions inherit 50% of your Thorns damage

            Great for defensive, low-risk gameplay

            Scales excellently in AoE and Pit content

            Key Gear & Aspects:

            Razorplate

            Spiked Armor – boosts Armor, Thorns, and Block

            Bristleback Aspect

            Blood Moon Breeches

            Sticker-thought Aspect – optional if using Decompose

            Quick Build Recommendations

            Top Overall:Bash Barbarian – raw power and versatility

            Best Mobility:Leap + Whirlwind Barbarian

            Most Unique:Poison Thorns Spiritborn – hybrid playstyle

            Best Survivability:Minion Necromancer – stay out of harm’s way

            Best New Synergy:Gorilla Spiritborn + Balazan’s Maxtlatl – full Thorns-to-Poison conversion

            From unstoppable Barbarian fury to precise Spiritborn bursts, Thorns builds are stronger than ever in Diablo 4 Season 9.Get your buy Diablo 4 Items from MMOexp today and dominate every battle with confidence! Gear up, equip your Razorplate, stack damage multipliers, and watch your enemies destroy themselves.

            Diablo 4 Season 9: Best Builds for Infernal Hordes

            Diablo 4 Season 9: Sins of the Horadrim has reshaped the endgame by introducing new mechanics, Uniques, and high-octane activities. Among the most exciting additions is the Infernal Hordes, a wave-based challenge that pits players against relentless enemies in the Realm of Hatred. To access this event, you’ll need an Infernal Compass, and once inside, you’ll face waves of demons, gather Burning Aether, and battle the Fell Council for some of the best loot in the game.

            This activity is fast-paced and rewards efficiency: you’ll have 60 seconds per wave to slay as many monsters as possible while collecting Aether. After surviving enough waves, you’ll face off against the Fell Council in a climactic encounter that tests both your damage and survivability. Since loot at the end depends on how much Burning Aether you’ve earned, optimizing your build is essential.

            This guide covers the best Infernal Horde builds in Diablo 4 Season 9, their key Diablo IV Items, and why they thrive in this unique endgame mode.

            Why Buildings Matter in Infernal Hordes

            Unlike other content, Infernal Hordes require constant AoE (area of effect) damage, strong crowd control, and wave-clearing speed. Every second counts: mobs spawn endlessly, and you must balance raw power with survivability. Builds that perform best here usually share three qualities:

            1. AoE dominance – clearing huge packs efficiently.

            2. Mobility – repositioning quickly between spawns.

            3. Sustain or passive damage – minimizing downtime while farming waves.

            With that in mind, let’s break down the top builds for Diablo 4 Season 9 Infernal Hordes.

            1. Hydra Sorcerer – Pyromancer’s Playground

            ·Key Item: Ophidian Iris (Unique Amulet)

            ·Playstyle: Stationary turret DPS with screen-wide AoE.

            ·Strengths: Hands-free damage, excellent scaling, Pyromancy synergy.

            The Hydra Sorcerer has become a meta-defining build thanks to Season 9’s new Ophidian Iris amulet. This item turns Hydra into a Core Skill, always summoning a three-headed beast whose attacks explode on impact. Additional Hydra heads increase the summon’s size and damage, making this build devastating in wave content.

            Hydras do the work for you, melting mobs while you focus on mobility and defensive cooldowns. With proper setup, you’ll cover the map with fiery explosions and constant AoE.

            Recommended Aspects & Skills:

            ·Serpentine Aspect – extends Hydra duration.

            ·Fireball Enchantment – for passive AoE explosions.

            ·Flame Shield – emergency survivability.

            ·Inferno (Ultimate) – for grouping enemies into Hydra burn zones.

            This build is perfect for Infernal Hordes because Hydras can clear multiple spawn points simultaneously, ensuring you maximize Burning Aether collection.

            2. Quill Volley Spiritborn (Poison) – Burst & Sustain Hybrid

            ·Key Item: Rod of Kepeleke (Unique Weapon)

            ·Playstyle: Ranged AoE with guaranteed crits.

            ·Strengths: Huge poison coverage, strong mobility, high scaling potential.

            The new Spiritborn class shines in Infernal Hordes, and the Quill Volley Poison build is its flagship setup. With the Rod of Kepeleke, Quill Volley becomes a max-size, auto-crit, basic skill. This lets you spam massive volleys of poison-tipped quills across the battlefield.

            The poison DoTs (damage-over-time effects) stack endlessly, creating waves of toxic damage that persist even as you kite or reposition. This makes the build excellent for controlling space in the confined maps of Infernal Hordes.

            Recommended Gear Priorities:

            ·Poison DoT multipliers.

            ·Increased Basic Skill Attack Speed.

            ·Energy Regeneration/Cooldown Reduction for uptime.

            For wave clearing and boss fights alike, this build offers an ideal mix of burst AoE and sustained DPS.

            3. Pulverize Druid – Poison Earthquake Combo

            ·Key Item: Rotting Lightbringer (Unique Mace)

            ·Playstyle: Overpower-focused AoE with poison synergy.

            ·Strengths: Beginner-friendly, tanky, early/mid-game powerhouse.

            The Pulverize Druid continues to be a fan-favorite in Season 9, now enhanced by the Rotting Lightbringer. This mace makes every Overpower trigger a 600% poison burst over 7 seconds, turning your Pulverize into an earth-shattering wave-clearer.

            The build’s simplicity and natural tankiness make it ideal for players learning the Infernal Horde mechanics. Though slower than Rogues or Sorcerers, the durability and poison AoE explosions make it reliable even in higher-tier waves.

            Best Aspects & Skills:

            ·Ursine Strength – boosts Overpower scaling.

            ·Poison Creeper – roots and groups mobs.

            ·Blood Howl – for sustain and Fury regen.

            If you’re entering Infernal Hordes without fully optimized gear, this is one of the safest and most effective choices.

            4. Balazan’s Poison Rake Spiritborn – The Thorns Death Machine

            ·Key Items: Razorplate (armor) + Balazan’s Maxtlatl (Unique weapon)

            ·Playstyle: Thorns/Poison hybrid that punishes enemies for attacking.

            ·Strengths: Semi-passive gameplay, incredible survivability, great for farming.

            This Thorns Spiritborn build flips the script: instead of actively dealing damage, you punish enemies for hitting you. By combining Razorplate’s massive Thorns bonus with Balazan’s Maxtlatl, which converts Thorns into poison damage, enemies essentially kill themselves while you stand your ground.

            It’s especially effective in Infernal Hordes, where waves of melee mobs rush you constantly. The more they swarm, the faster they die. However, you’ll need to watch out for ranged enemies, as they can bypass your Thorns advantage.

            Recommended Stats:

            ·Increased Thorns %.

            ·Poison Duration/DoT scaling.

            ·Defensive affixes like Damage Reduction vs Close.

            This build is ideal for low-APM farming and marathon Infernal Horde sessions, though it lacks high burst damage.

            5. Blood Wave Necromancer – Corpse Explosion Overload

            ·Key Items: Kessime’s Legacy (Unique Pants), Tidal Aspect.

            ·Playstyle: Wide AoE wave spam with corpse synergies.

            ·Strengths: Safe, consistent, excellent mob grouping.

            The Blood Wave Necromancer remains one of the most reliable Infernal Horde builds despite nerfs. Using Tidal Aspect, you can summon multiple Blood Waves at once, while Kessime’s Legacy pulls mobs into your waves and corpse explosions.

            This build excels at controlling the screen, creating bottlenecks that make wave farming highly efficient. It’s less burst-heavy than Hydra or Rogue builds but offers one of the safest playstyles thanks to ranged AoE and crowd control.

            Best Enhancements:

            ·Corpse Explosion Damage.

            ·Essence Regeneration.

            ·Cooldown Reduction for Blood Skills.

            Perfect for mid-tier Horde farming, though it may fall off at the very top end.

            6. Whirlwind Quake Barbarian – Spinning Earthquake Juggernaut

            ·Key Item: Aspect of the Quaking Rage.

            ·Playstyle: Constant Whirlwind AoE with quake synergy.

            ·Strengths: Durable, mobile, strong, sustained DPS.

            For players who enjoy fast-paced melee AoE, the Whirlwind Quake Barbarian is unmatched. By combining Whirlwind’s Fury generation with quake procs, you create a nonstop earthquake zone around your Barbarian.

            The build isn’t as flashy as Sorcerer nuke, but it makes up for it with smooth gameplay, durability, and mobility. With proper Fury management, you can chain Whirlwind + Quake infinitely, mowing down Infernal Hordes while barely slowing down.

            Key Aspects:

            ·Quaking Rage – core damage engine.

            ·Limitless Rage – resource sustain.

            ·Weapon Master’s Aspect – added flexibility.

            This is one of the most enjoyable Infernal Horde builds thanks to its fluid combat style.

            Final Thoughts

            Infernal Hordes in Diablo 4 Season 9 are a true test of build efficiency, AoE dominance, and survival instincts. While any class can succeed with the right setup, the builds listed above offer the best combination of wave-clearing potential and endgame scalability.

            ·Best for AoE dominance: Hydra Sorcerer.

            ·Best hybrid burst/sustain: Quill Volley Spiritborn.

            ·Best tanky beginner build: Pulverize Druid.

            ·Best semi-passive farmer: Balazan’s Poison Thorns Spiritborn.

            ·Best control/safety option: Blood Wave Necromancer.

            ·Best melee DPS: Whirlwind Quake Barbarian.

            Whether you’re farming Burning Aether for loot, pushing high-tier challenges, or simply exploring Season 9’s new endgame, these builds will give you the edge you need to conquer the Infernal Hordes. And if you’re looking to fine-tune your setup faster, you can always farm or buy Diablo 4 items like Uniques and crafting mats from trusted trading platforms to complete your build.

            Diablo 4 Season 9 Needs a New Greater Lair Boss-And Elias Is the Perfect Pick

            Season 9 has cemented Diablo 4 seasonal formula. With impactful quality-of-life updates, the Horadric Powers system, and an expanded boss ladder, the endgame feels more rewarding than ever. But one area still falls short:the Lair Boss lineup.

            For dedicated grinders pushing through hundreds of runs, the issue isn’t difficulty or resource cost—it’s the lack of variety, especially in the Greater Lair Boss tier. Right now, players spend most of their time farming Andariel and Duriel over and over just to gather the summoning materials for Belial. Running the same arenas 20+ times in a row drains the excitement from an otherwise thrilling system.

            Blizzard already has a ready-made solution sitting in the game’s lore:bring back Elias, the immortal traitor of the Horadrim, as a Greater Lair Boss.

            Why Elias Belongs in the Greater Tier

            From both a lore and gameplay perspective, Elias is a natural fit:

            Blizzard has already reimagined campaign bosses for endgame—Andariel, Duriel, Lord Zir, and Astaroth all returned in upgraded forms.

            His campaign fight already mirrors Lair Boss design, with multiple phases, arena changes, and unique mechanics.

            He has a distinct visual style, memorable voice acting, and deep narrative ties—exactly what makes bosses stand out.

            Story-wise, he’s still alive. Thanks to Lilith ritual, Elias is immortal, making his return entirely believable without retconning anything.

            The Current Problem With Greater Bosses

            Initiate Tier:Varshan, Grigoire, Beast in the Ice, Lord Zir, Urivar (Vessel of Hatred)

            Greater Tier:Andariel, Duriel, Harbinger of Hatred (DLC)

            Exalted Tier:Belial

            For base-game players, only two Greater bosses exist—both mandatory for farming Belial materials. Adding Elias would instantly break up the monotony while keeping development costs low.Get your Diablo 4 gold from MMOexp today and dominate every battle with confidence!

            How Elias Could Work as a Greater Lair Boss

            Elias could be integrated using the same framework as existing bosses, with a new drop—such as Shard of the Triune Ritual or Fallen Horadrim Remnant—earned from Initiate-tier bosses.

            Proposed Fight Structure:

            Phase 1 – Master of the Triune

            A ritual-heavy battle filled with erupting spikes, homing blood sigils, and waves of Triune cultists.

            Phase 2 – Arena Shift

            Elias escapes in a burst of blood magic, forcing players through a gauntlet of exploding sigils and teleporting ambushers.

            Phase 3 – Fallen Horadrim

            A relentless final phase with rapid attacks, triple-direction blood wave walls, shadow clones, and chaotic teleport patterns—combining Duriel aggression with Astaroth magical flair.

            Key Features:

            No Lorath ally for assistance.

            Increased speed and HP scaling to rival Duriel.

            Mythic Unique loot table featuring Triune-themed caster gear and Necromancer-focused items.Instead of wasting countless hours farming for cheap Diablo 4 Items, choose MMOexp where we provide gold in a fast, secure, and affordable way.

            Why Elias Benefits the Game

            Adds Variety:A new Greater-tier boss would finally break the farm cycle of just Andariel and Duriel.

            Encourages Build Diversity:Different resistances and mechanics would demand fresh strategies.

            Deepens Lore:His return ties directly into Horadrim betrayal and Triune themes.

            Appeals to Casters & Necromancers:Provides a thematic and mechanical challenge for magic-focused builds.

            Lore Justification:Elias Story Isn’t Over

            Elias campaign arc centers on immortality, devotion to Lilith, and his twisted Triune ideology. The player never destroys his Horadric sigil—the only way to kill him for good—so his survival is canon. His reappearance would close narrative gaps while setting up the rumored 2026 Horadrim-focused expansion.

            Season 9 has momentum, and Blizzard should use it to strengthen one of Diablo 4 best systems:the Lair Boss ladder. Elias is already built, lore-appropriate, and mechanically suited for the Greater tier. His inclusion could refresh the endgame loop with minimal development work—exactly what Diablo 4 needs right now.

            Flame Cape in Old School RuneScape:Overview & Guide

            The Flame Cape is a powerful and iconic melee cloak in Old School RuneScape, known for its fiery design and high combat bonuses. Awarded for completing the TzHaar Fight Cave, it’s a symbol of a player perseverance and combat skill. Second only to the Infernal Cape, it remains a highly respected item in both PvM and PvP circles.

            How to Obtain the Flame Cape

            To earn the Flame Cape, players must defeat TzTok-Jad, the final boss of the TzHaar Fight Cave. This challenge involves surviving 63 waves of enemies, culminating in a high-pressure battle against Jad, who requires flawless prayer switching to defeat. The encounter is regarded as one of the most difficult solo PvM tasks in the game.Play smarter, not harder – get OSRS gold with RSgoldfast now and enjoy the game your way!

            Successfully completing the Fight Cave rewards players with the Flame Cape, signifying mastery over one of the most intense combat trials in Gielinor.

            Combat Bonuses and Benefits

            The Flame Cape is a top-tier melee item with substantial combat advantages:

            Strength Bonus: Increases melee max hit, making it ideal for DPS-focused builds.

            Attack and Defence Bonuses: Enhances melee accuracy and protection, boosting performance in both PvE and PvP.

            Minor Stat Enhancements: Provides small bonuses across other combat styles, adding versatility for hybrid setups.

            This makes the Flame Cape a go-to option for players who haven’t yet obtained the Infernal Cape but still want powerful gear.

            Additional Features and Uses

            Symbol of Accomplishment

            Wearing the Flame Cape demonstrates a player success in one of OSRS most iconic and challenging pieces of content. It’s widely recognized in the community as a mark of PvM competency.

            Storage and Display

            Players can store the cape in their player-owned house:

            Cloak Rack (Clothing Room) – for practical equipment storage.

            Achievement Gallery – to proudly showcase completion of the Fight Cave.

            Trade Options and Rewards

            Sell for Tokkul: Exchange the cape for 8,000 Tokkul at TzHaar-Mej-Jal.

            Tzrek-Jad Pet: Sacrifice the cape for a chance to unlock Tzrek-Jad, a miniature version of TzTok-Jad that follows the player.

            This choice adds flexibility—players can opt for a currency reward or strive for a prestigious pet.

            Max Cape Integration

            Players who have reached level 99 in all skills can combine the Flame Cape with the Max Cape to create the Flame Max Cape. This enhanced version retains the original bonuses while granting the utility and appearance of the Max Cape—a perfect fusion of style and substance for maxed accounts.

            Utility at Wintertodt

            The Flame Cape is considered warm clothing, meaning it provides protection from cold damage during the Wintertodt Firemaking event. This allows players to maintain melee combat bonuses while training a non-combat skill.Join thousands of satisfied players and choose RSgoldfast to get fast and reliable RuneScape gold for sale. Your journey to riches starts here!

            The Flame Cape is one of the most respected and useful items in Old School RuneScape. With its strong melee stats, multifunctional benefits, and status as a Fight Cave reward, it serves as both a practical piece of gear and a mark of honor. Whether you’re chasing your first major PvM achievement or adding to your collection of prestigious items, the Flame Cape is a worthy goal for any serious player.